I have a bit of an obsession for making Sew Together bags. I’ve been working through a list of friends to gift them to, but had not yet settled on the one that would become mine.
Well, last week, I finally finished the one I had been working on just for me!
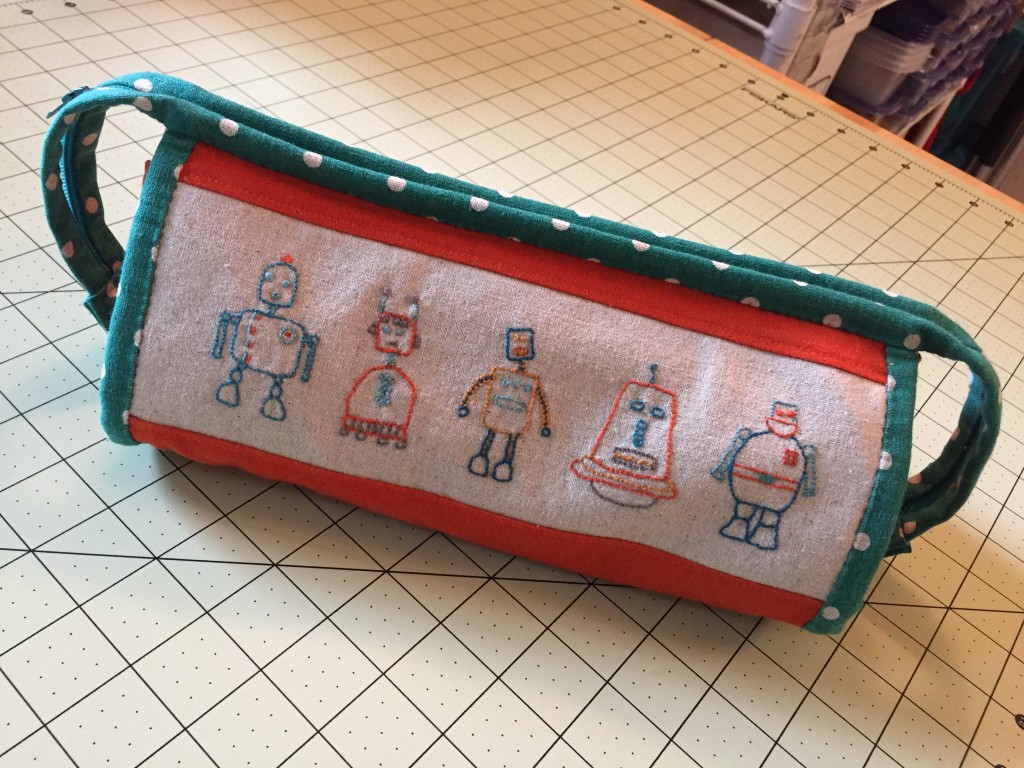
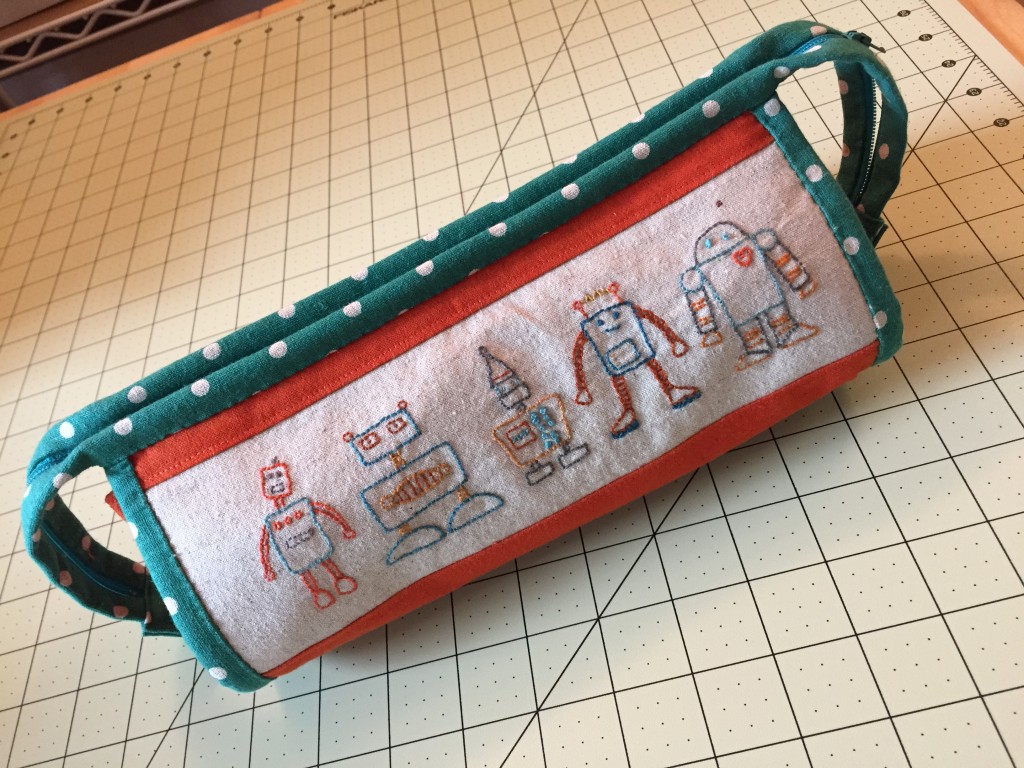
I used an embroidery pattern by Shiny Happy World, and made a row of cute robots for each side of the bag:
For those who like to keep score on crazy, this is my 18th one 🙂
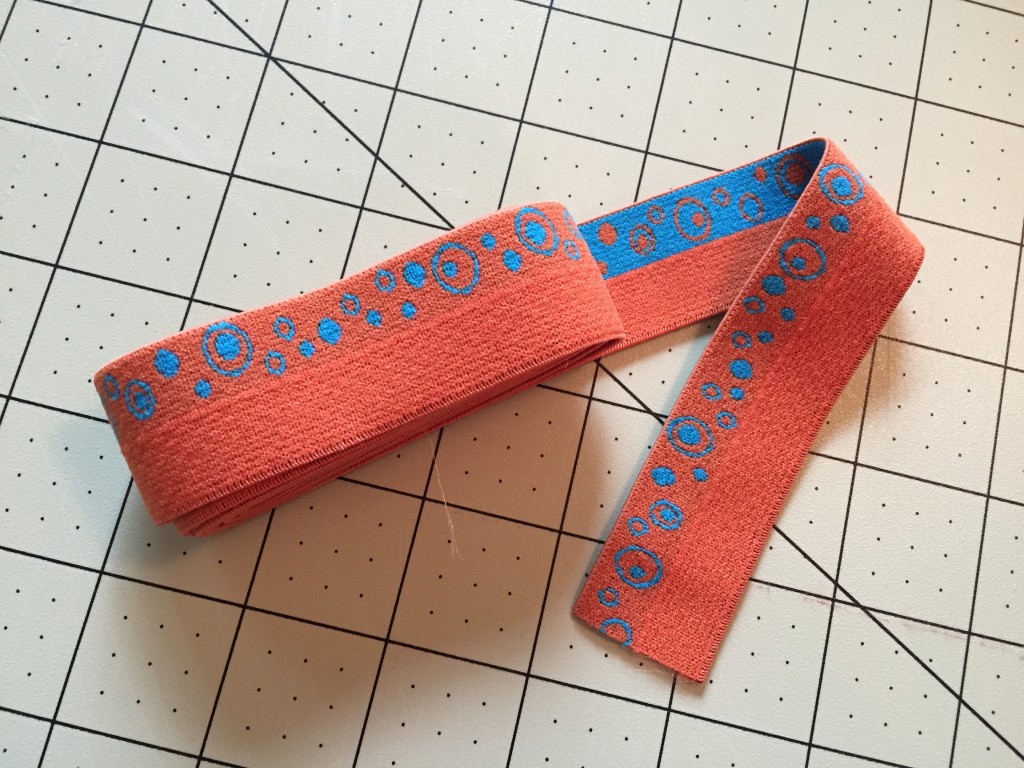
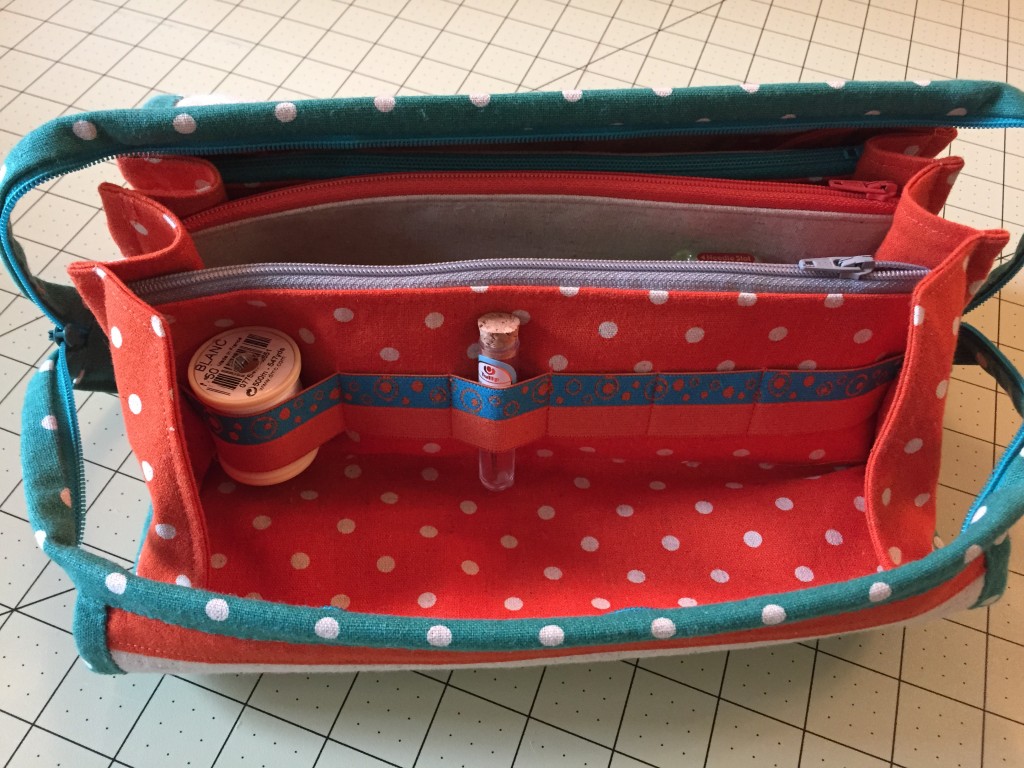
One thing about making so many of them is that I had time to ponder exactly how I wanted mine to function. So I decided to add a couple of modifications, using some pretty fold-over elastic, like this one from Babyville.
These get sewn in between steps 3 and 4 of the original Sew Together Bag pattern, after you make the markings for step 4, but before you sew those marks. No I’m not sharing the pattern because you should buy your own copy!
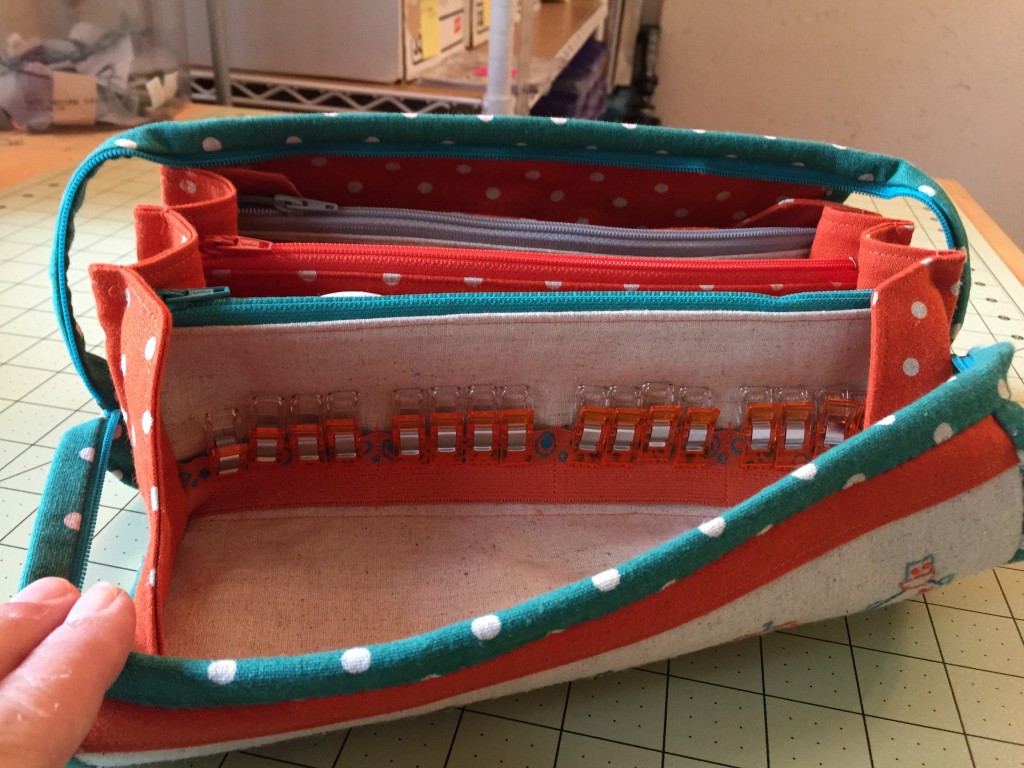
On the far outer side of one pocket, I positioned the elastic about a 1/4” up from the markings for step 4, and sewed horizontally down the center line of the fold-over elastic. I then played with some groupings of Clover Wonder Clips to map out where I could sew a few vertical lines for stability. Yes, I have a lot of ORANGE clips because kind friends have traded me for their favorite colors!
On the far opposite side, I ran the elastic along the middle of the pocket horizontally, and sewed it vertically at intervals intended to hold small threads and tubes of Tulip Needles (love these needles!)
Both of these modifications have allowed me to keep more pockets free for other things, and it made the clips easier to grasp, as opposed to digging them out of a pocket.
And a last tip, designed by my friend Monica… always designate one pocket for all the metal items you carry, and color code the zipper to help you remember. In her bags, metal things go in the gray pocket. I have enjoyed making all the zippers different to help with sorting, but gray=metal is genius!
*******


Although I’ve not made a sew together bag myself yet I can see why they would be highly addictive. I love the addition of the elastic – it’s defintiely a really practical idea and really adds great functionality. I’ve not come across fold over elastic befor, i’ll definitely bee on the look out for some now.
When I saw the comment about elastic, I thought maybe you were putting it along the sides – I use mine as a pencil case at work and my pens fall out the sides at times. (Maybe it’s because as a nurse, I hoard my pens so no one steals them!)
I can see that you are an expert at these bags, your binding are so clean! Do you sew them from the inside and wrap them around the outside? Do you machine sew the binding down or hand sew? I need to tackle another bag, I was just so happy to finish the first one the bindings are less than stellar (read: looks like crap.) Thanks for your help!
Hi Jacklynn! I have yet to machine both sides of any binding and be happy with the results. On this bag, I first sew the sides to the outside, then sew one edge of the binding to that (the pattern says to sandwich it all into one seam, but again, I seem to spend more time ripping things that slip when I do it that way). I do the second side of the binding by hand, as I do in all my quilts. One fast tip… get the side bindings machined on, then just turn the binding at the top edges where the last zipper will go, and baste them down in the zipper seam allowance by machine. That way, you can move on to the zipper and its binding without stopping for hand work in between. I love the hand finishing – I find it meditative, and it gives me a reason to watch a bit of telly in the evenings!
This is a great idea. Now I’ll have to make another Sew Together Bag to incorporate this idea.
I like your elastic idea. I have this pattern but have yet to make one. One of these days . . .
LOVE IT you are so very clever!
I think you and I are neck and neck with number of bags made – just finished my 18th too! The pattern is well worth the costAnd one more to go for a cousin who missed out on the first batch. I love your idea with the elastic!
I love the elastic idea