
This post is also part of the Colorblock LOVE tutorial series, and the Colorblock Love QAL!
There comes a time in your quilt-making adventure where a pattern will call upon you to make a cut that’s longer than your mat or ruler.
Usually, a 24” mat is all you’ll ever need, until you need to make a 30” cut. But rest assured, you can make a cut that’s longer than your mat. Read on for some tips…
Prep the fabric
I’m in the camp of not washing my fabric before I use it (unless I’m making a garment, in which case I wash all the shrink out of it first) so my fabric usually has that little bit of stiffening from the manufacturing process. This is sizing. It’s a bit like like starch, though less crispy, and gives fabric a bit of firmness. The firmer hand means your fabric will wiggle and stretch less than if it was freshly washed. If you prefer to wash your fabric first, then add the sizing back in before you cut it. You can also add starch or sizing to unwashed fabric to give it a boost of firmness before cutting anything long or tricky.
Good old-fashioned spray starch in a can is good when used sparingly, but often quilters use a newer product called Best Press. It comes in different scents (my preference being UN-scented!) and works well in places where you need a more stable fabric – and specifically for long strips that become part of long seams. Use according to the instructions (especially the part about having a clean sole plate on your iron) and start out sparingly until you get used to it.

Align the fabric to your mat
Many of us have been taught to fold fabric in half twice to cut it on a mat that is 18” tall. But every time you fold a fabric, you add another opportunity for inaccuracy to creep in. If your folding technique is not spot-on, you’ll cut a strip that resembles a chevron! Thus, my preference is to fold the fabric only once, selvedge to selvedge.
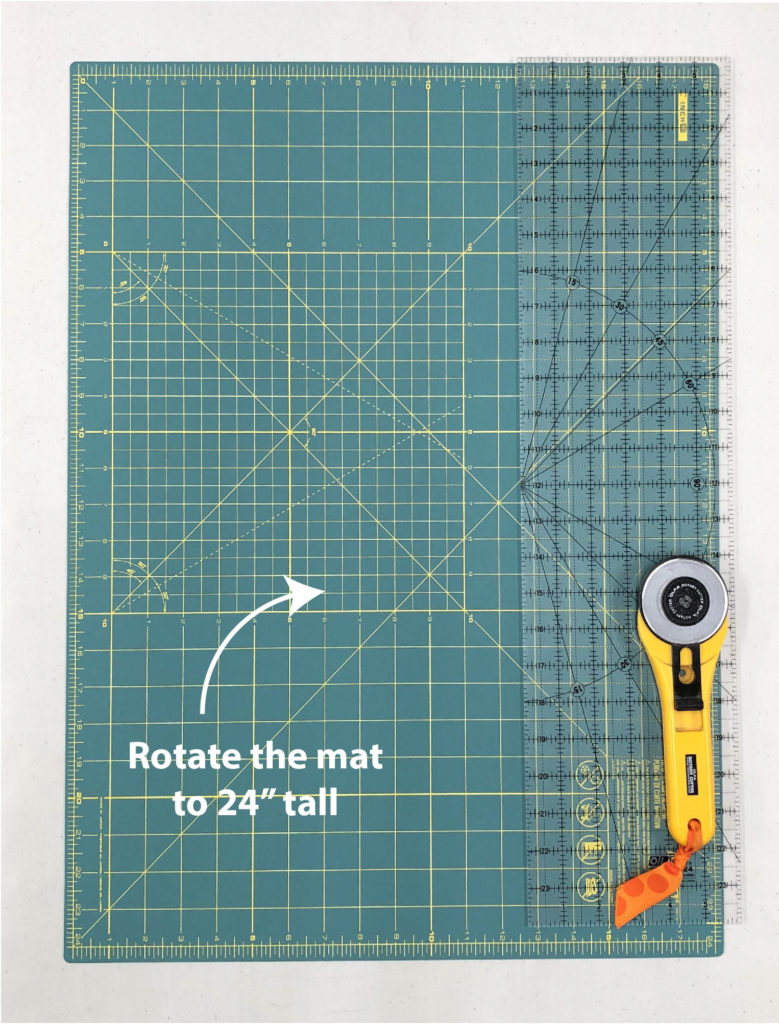
You can work with this on a smaller mat by rotating the mat to be 24” tall. Your fabric is probably no wider than 44”, which means 22” folded in half, which will fit nicely on a 24” mat.
Fold the fabric once, selvedge to selvedge, and align the fold to a line at the bottom of your mat, with the selvedges at the top. Aligning to the fold will give you the least chance of cutting your strips in to a V shape. I’m right-handed, so if you’re a leftie, these pictures will be a mirror image for you.
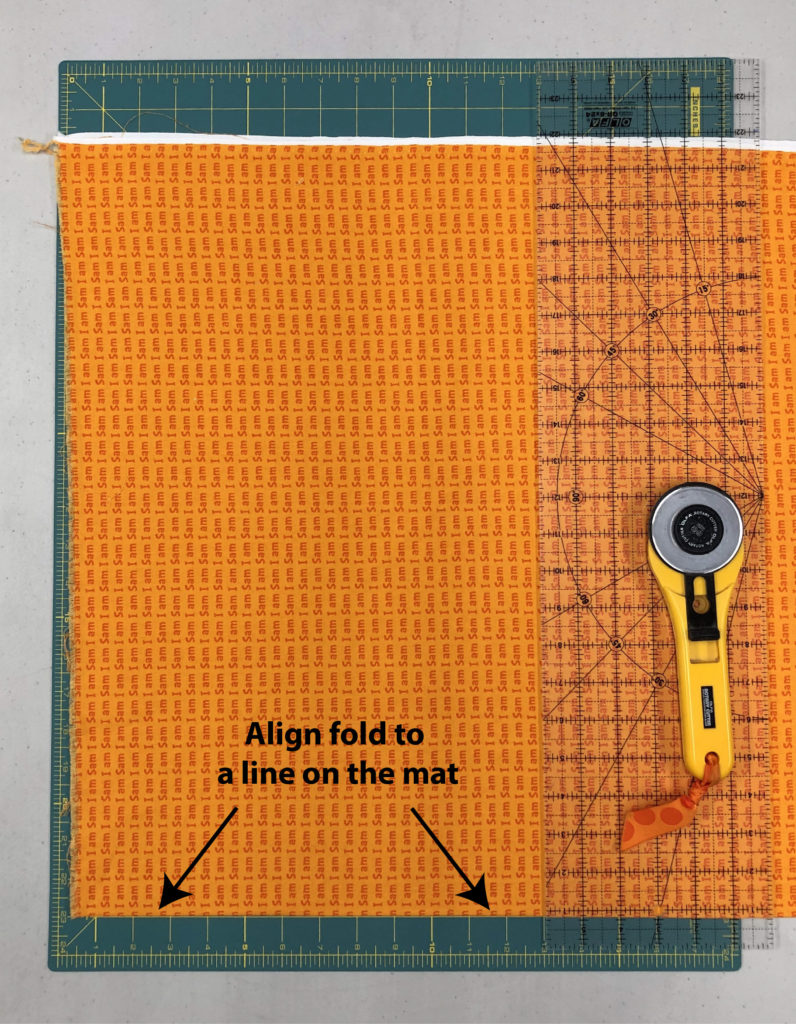
Align the ruler to the mat, and make your first cut to give yourself a clean edge.
Cut the strips
ALWAYS have the “good” part of the fabric under your ruler – the part that you’re cutting for, not the leftover. This way, if you veer off or wiggle, you don’t wiggle in the part you need. Also, because we put pressure on the ruler as we cut, what’s underneath doesn’t move much and gets cut more accurately. Wiggling isn’t so critical if you’re cutting a 2” strip (hopefully your pattern gave you a generous fabric quantity) but of you make a wiggle with an 8” cut you might be in danger of needing to shop for more.
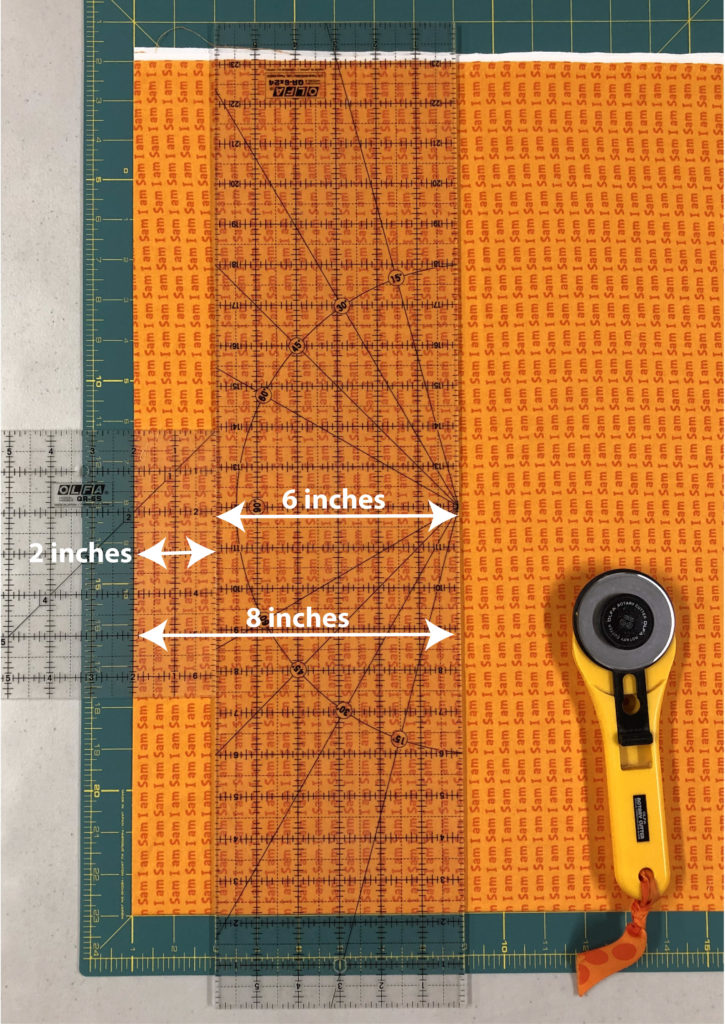
If your cut is wider than the ruler you have – for example, you have a 6” ruler, but you need an 8” cut – then stack two rulers together to get the width you need. Place them side by side (in this case a 6” ruler and a 6” ruler) then measure the 8” you need as if the rulers were fused together. Then, firmly holding the ruler closest to the cutting line, cut.
A side note… if your cutter grinds rather than swishes, or you have to go over a cut twice, you NEED a new blade. RIGHT NOW. They are less than the price of a frothy drink at a local cafe, and they are worth every penny in terms of your safety. Read here for more about maintaining your cutters, and here for why you need to close them!
Trim the strips
And now, for the fun. You have a 24” mat, and need a 30” strip. Here are a couple of ways to do that.
Method 1
First, take the selvedge off one end of the strip.
![]()
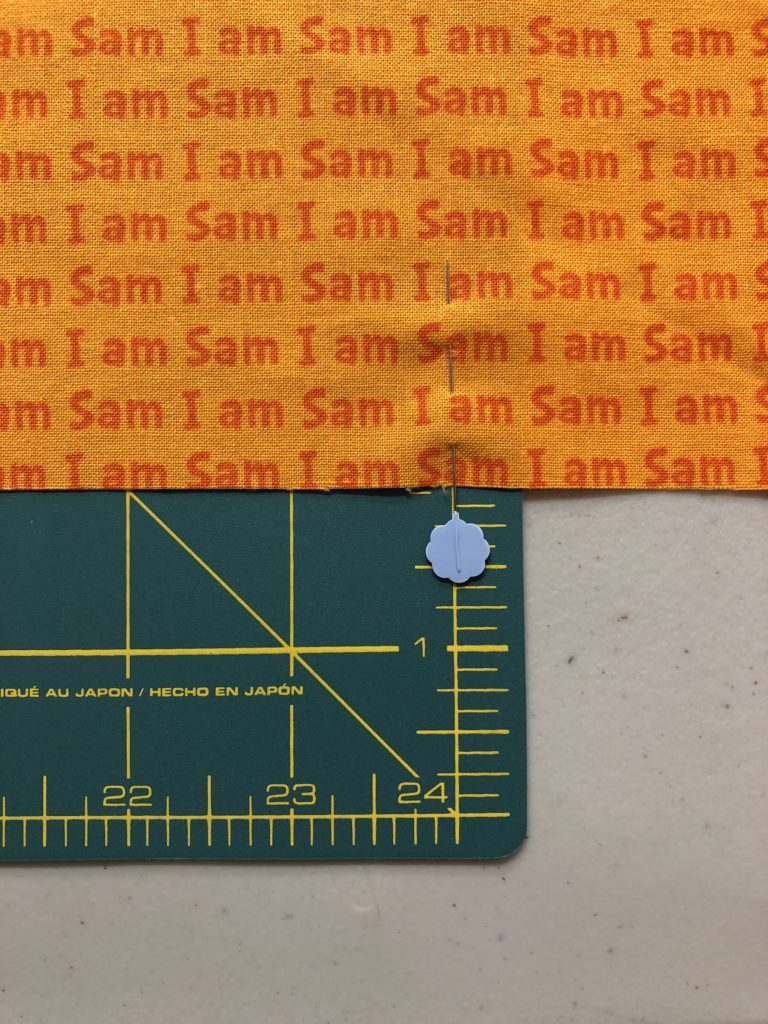
Lay it out on the mat, aligning to the zero line at one end and smoothing it across the mat, along a line. You want the fabric to be neither taut (stretched) nor wrinkly (loose). You might need to go back and iron out the fold in the middle. Flat fabric is CRITICAL to the accuracy, so put some time into making sure you get it flat. At the 24” mark, put a pin in the strip.
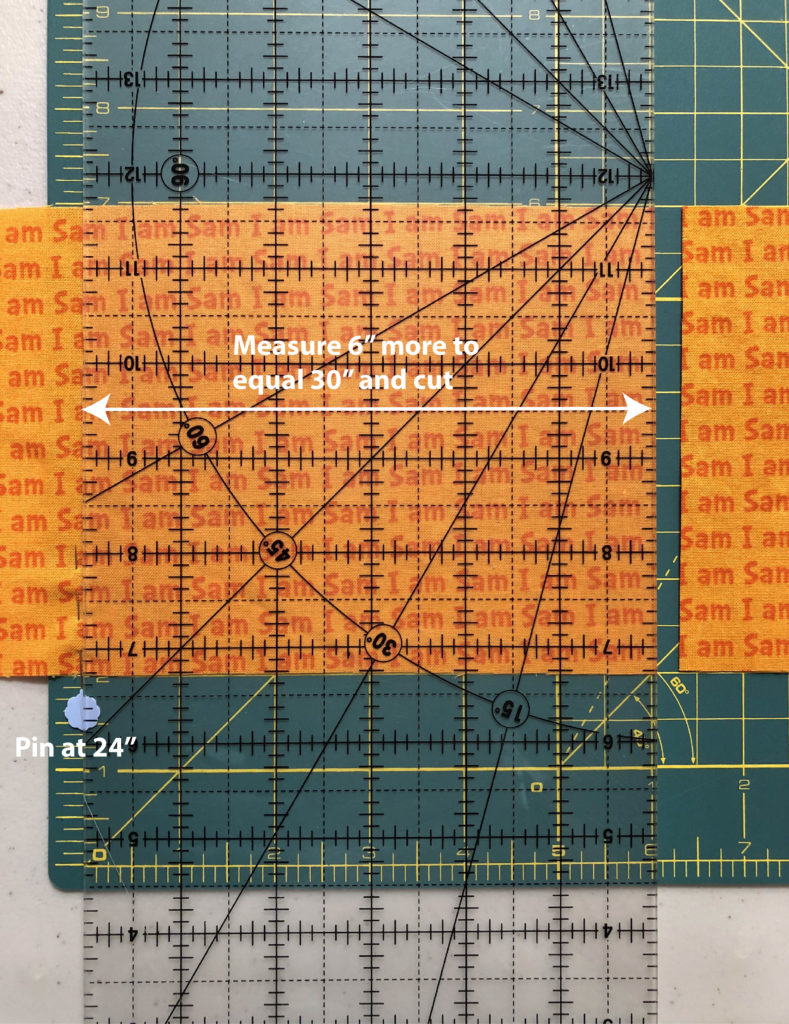
Scoot the strip so the pin is at the zero line. Measure out the remainder of the strip – 6 more inches if we’re aiming for a 30” strip – and then cut.
There’s a chance that you’ll be a couple of threads over or under the 30” mark with this, but in the big picture of quilting accuracy, I don’t think this shows up in a way that harms the quilt. When sewing 30” seams, there is ALWAYS easing going on, so a couple of threads-worth has very little impact.
Method 2
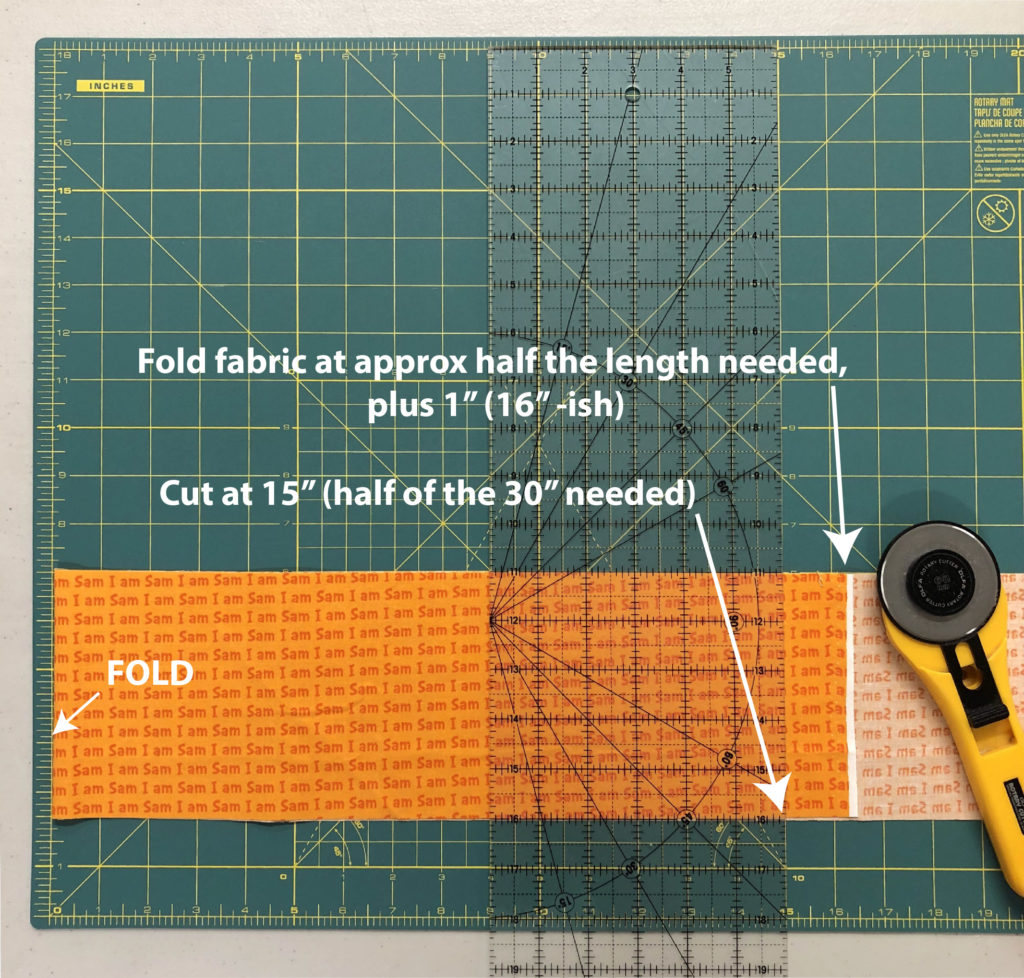
Fold the strip so that the part on top is an inch bigger than half the measurement needed. Let me explain with our 30” example: you need a 30” strip, so half of 30 is 15, plus 1 equals 16”. Fold the strip so the top part is about 16”, and the bottom is the rest of the strip.
Align the fold to the zero line. Measure out 15” (half of 30”) and cut. This preserves the remaining strip for something else.
If you don’t care about the leftovers of a long cut, just fold the strip in half, align the selvedges, and cut measuring from the fold. You’ll get 2 smaller leftover pieces instead of one bigger one.
And there you go – a nice 30” strip!
In closing: while I’m a big fan of not owning more than I need in the tools department, I also believe in being equipped as best I can be to make my sewing life easy on me. Thus, my studio includes a 24” x 36” mat, and I have 24” and 36” rulers. If your space and budget allow for a larger mat and ruler, I highly recommend getting them – they’ll make a lot of things a little easier, which, in turn, will make your sewing time more fun!
Thank you SO much for this tutorial! I have always struggled with this. And yes my cuts do have the chevron look!
I am a bad girl. If the cut is too long, I just rip the fabric. Of course, if it’s a bias or other angled cut, then I’m out of luck.
Without seeing this tutorial when I was making your LOVE quilt, I actually used your Method 1 except I used a pencil mark instead of a pin. But I really like your Method 2, and my brain would not have thought of it on its own! So thank you!
Thank you, as a fairly new quilter, this is very helpful!