
This a tutorial for the Colorblock LOVE pattern, specifically the V block. This post is also part of the Colorblock Love QAL!
Please refer to the pattern for all measurements! If you’re making the Kinship + LOVE version, follow the steps in the Addendum (pages 9-11). Note that for the Kinship + LOVE version of the pattern, there are no Kinship blocks in the V, so it’s not different from the main pattern.
Refer to the Cutting Long Strips tutorial for help as needed.
While the rest of the blocks in this quilt go together quite simply, the V has some bias to contend with. For our newbie quilters, bias is when the cut edge of the fabric is not on the straight grain, and it doesn’t run parallel or square to the threads in the weave of the fabric. The GOOD thing about bias is that it stretches; and the BAD thing about bias is that it stretches too! Thus, we can gently stretch a bias edge into submission when we need to, but we must be careful to not stretch it too far. Don’t let the bias edges intimidate you – we have some cool tricks to handle them. Read on!
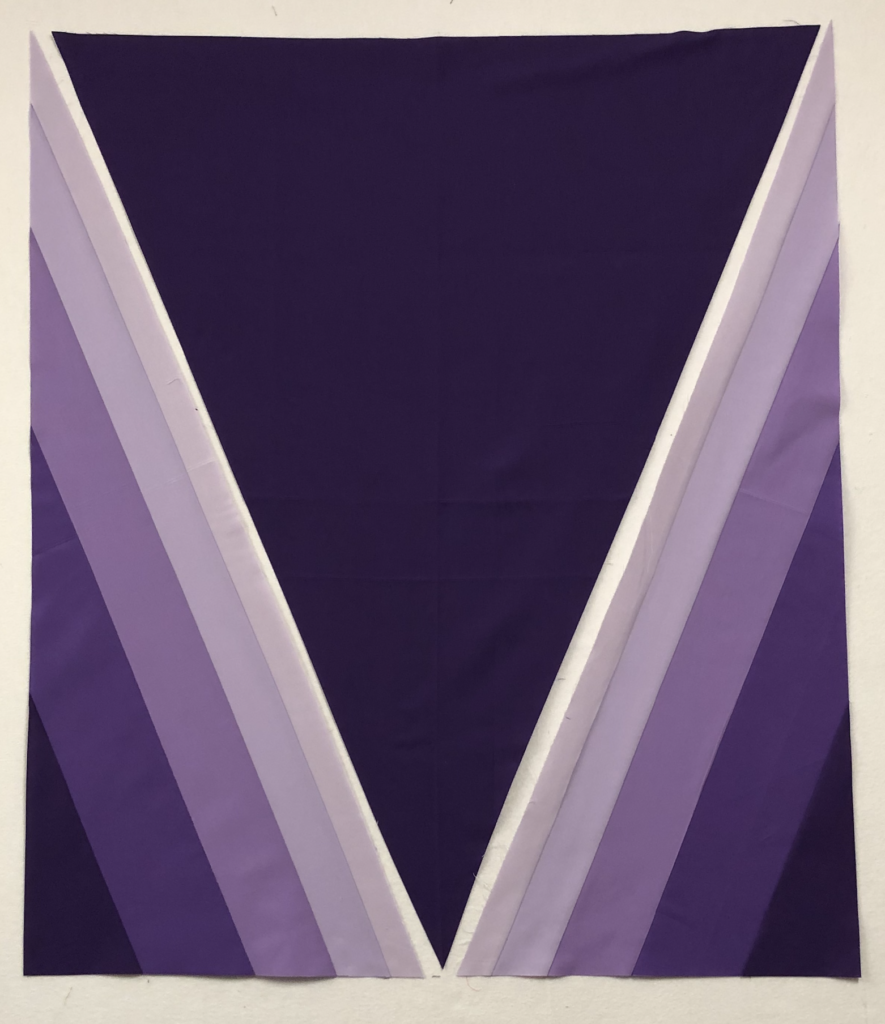
So let’s start with piece V1, the main body of the V:

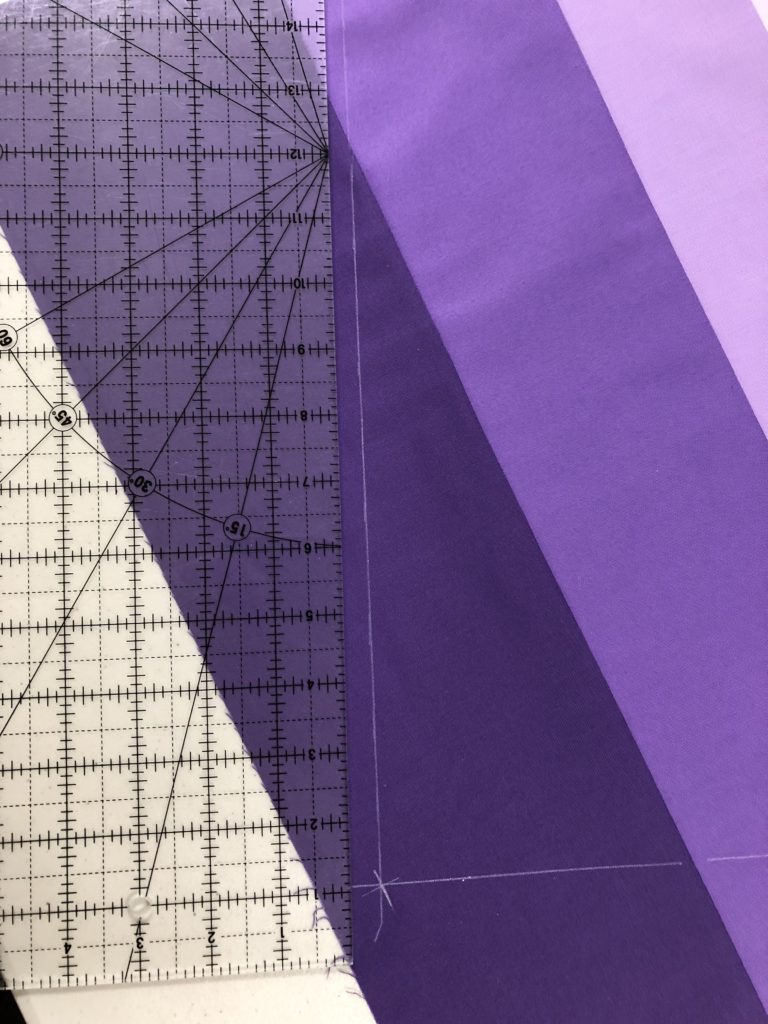
Follow the instructions at the top of page 5 of the pattern to fold this piece for cutting, and make sure your measurements match the drawing! If you don’t get the fold going in the right direction, your V will have the wrong proportions, and you’ll be shopping for replacement fabric!
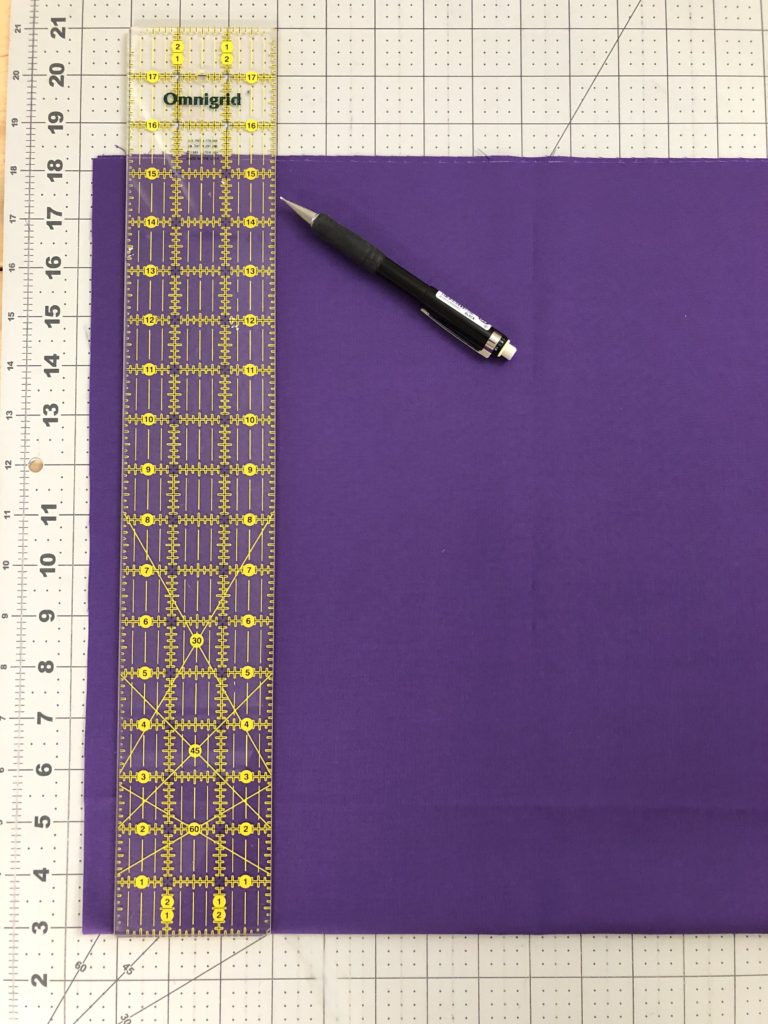
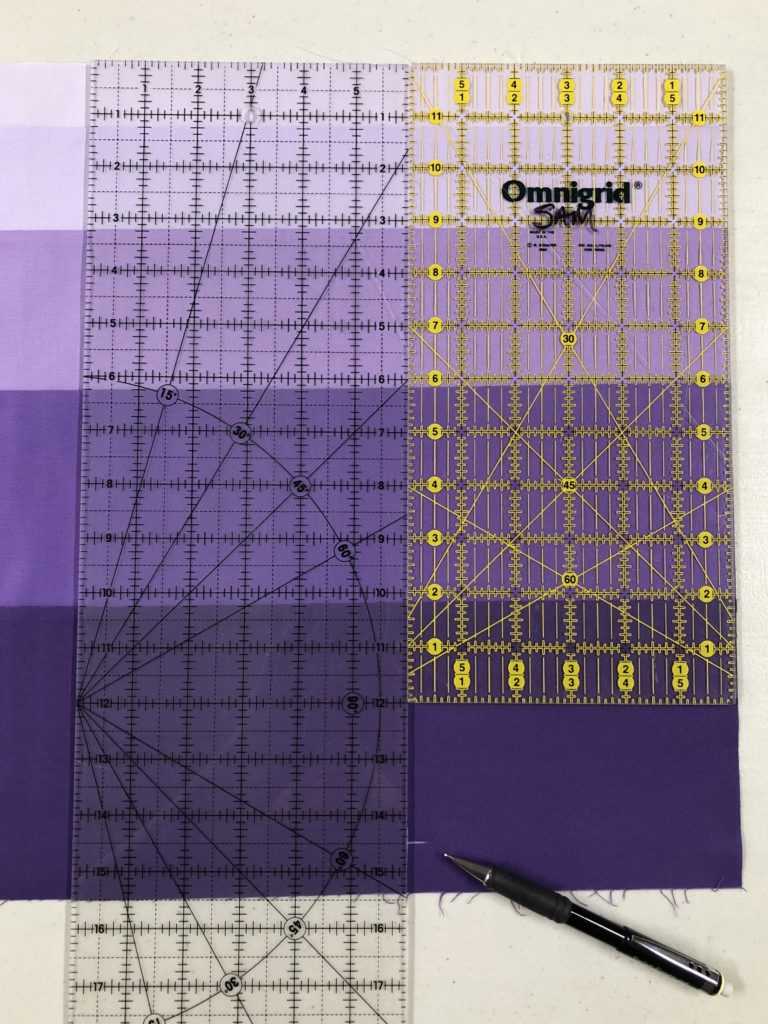
Mark the line you’ll be cutting; this helps a lot when your ruler or mat aren’t long enough, and you can see from the picture below that I have to turn this a little on the 36” mat! Note that I paired up a couple of rulers to cover that long line:
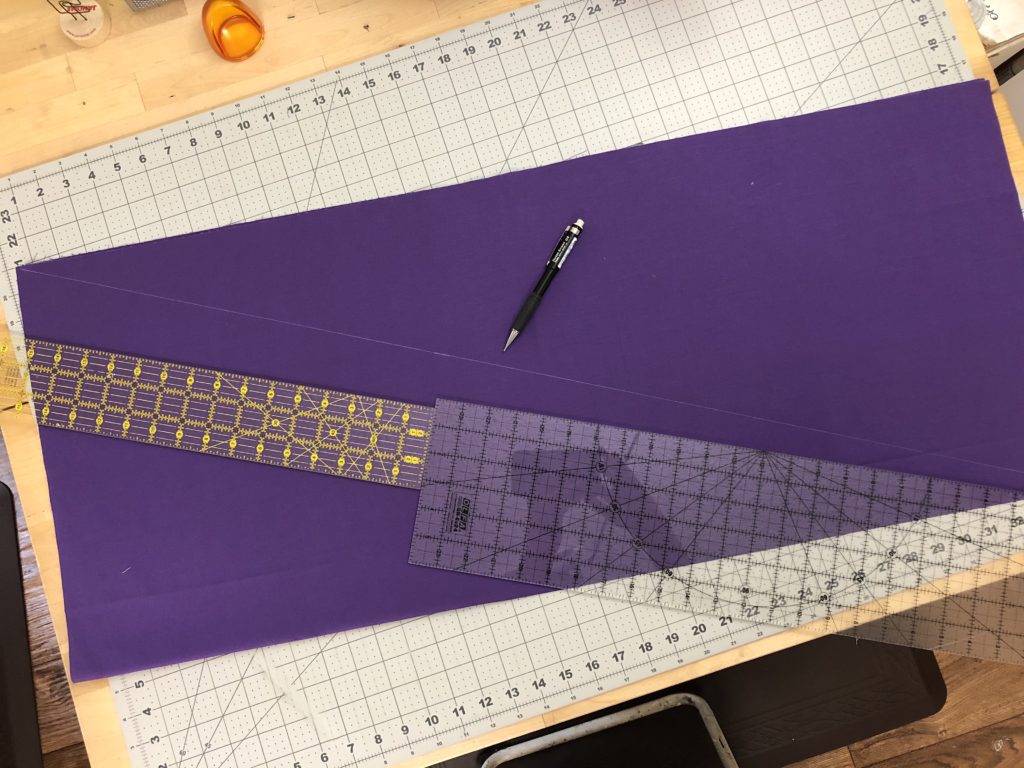
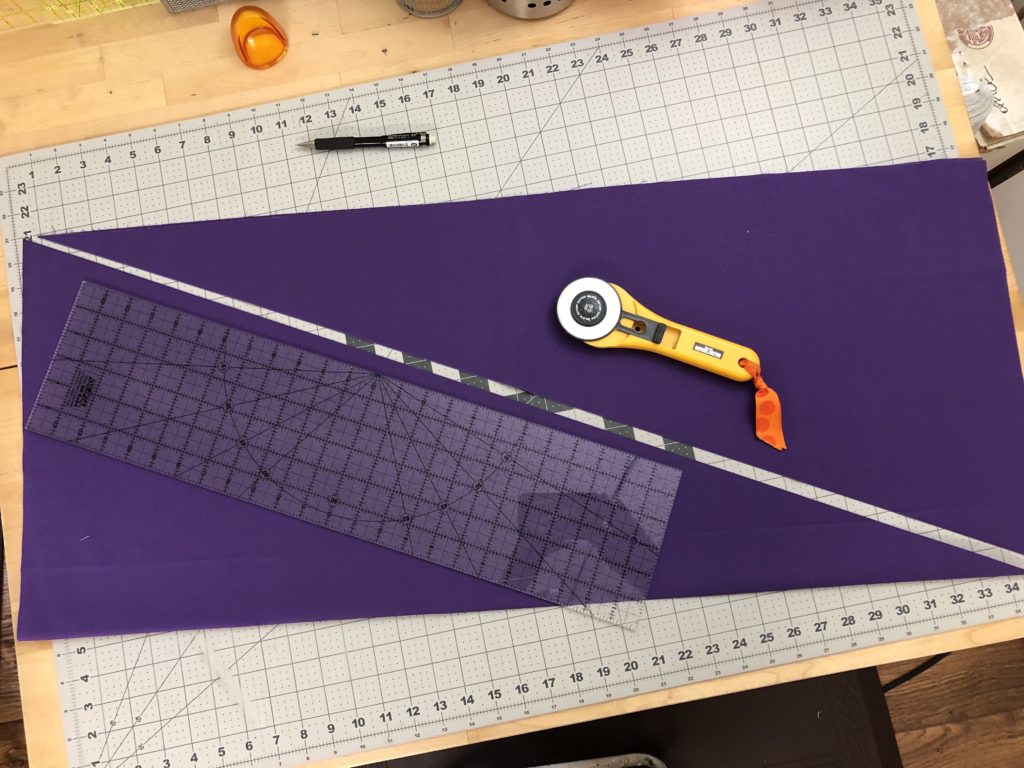
Nice reflections in the ruler of my hands taking the picture! And cut along the line:
I like to put the pieces up on a design wall or any other flat surface as I work:
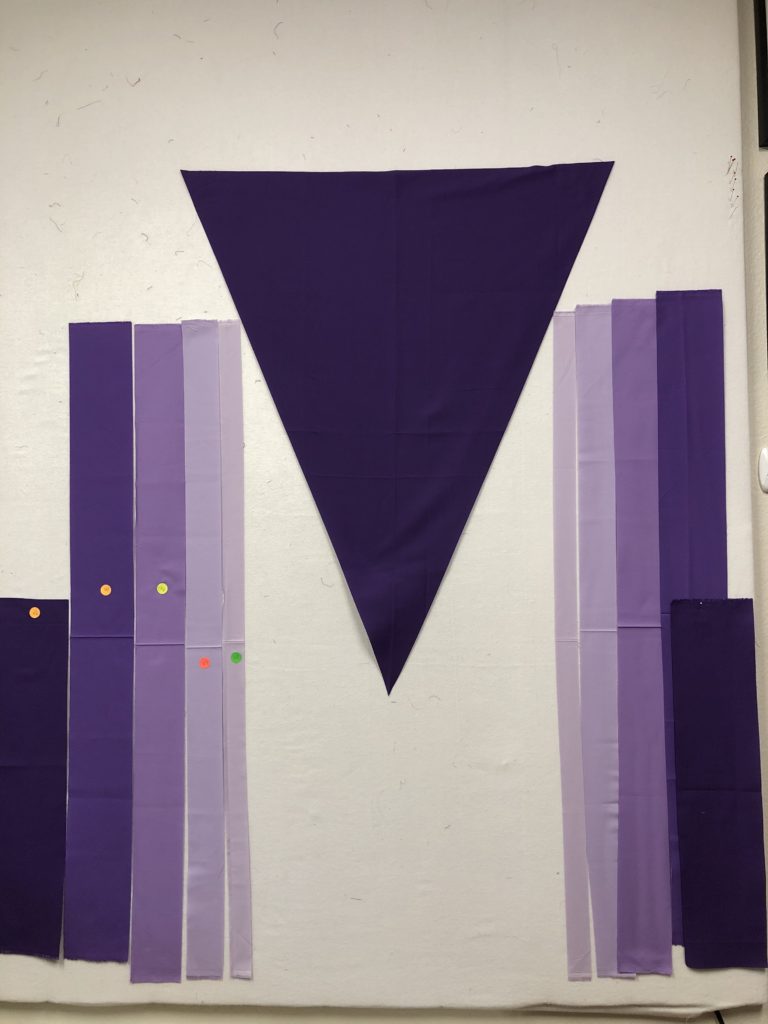
Look back on page 5, and start sewing the strips to match the drawings in the middle of the page. Refer to Sewing Long Seams Without Stretching Them for tips on sewing this block. Press at every seam:
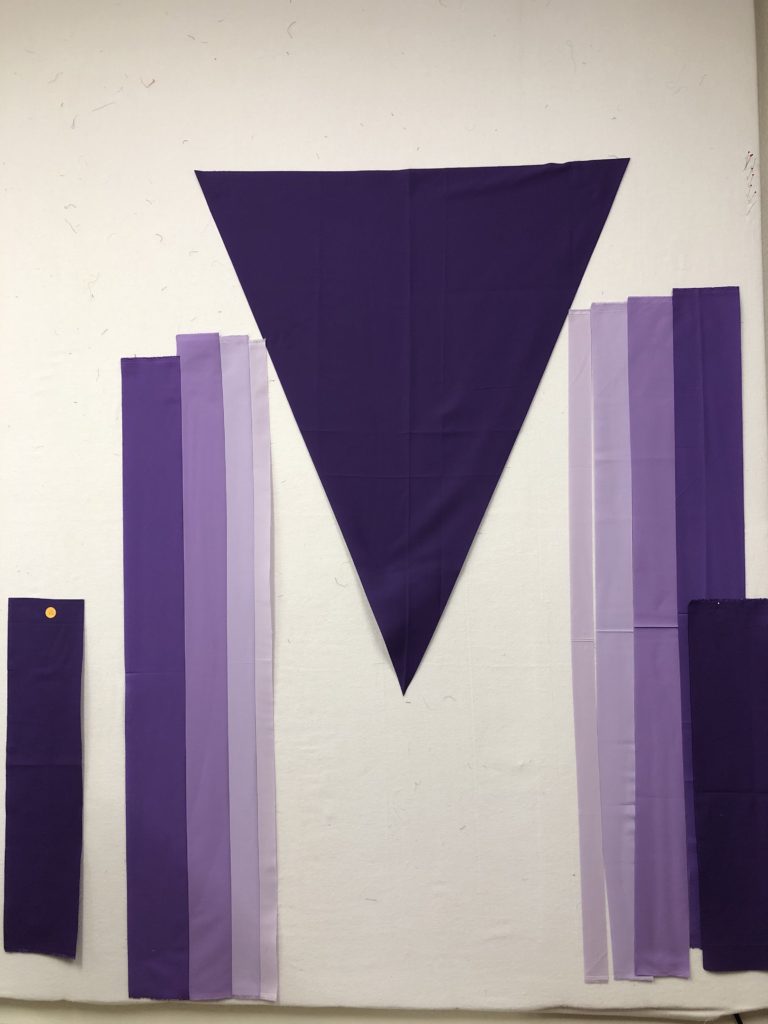
Make sure they are mirror image to each other, per the drawing!
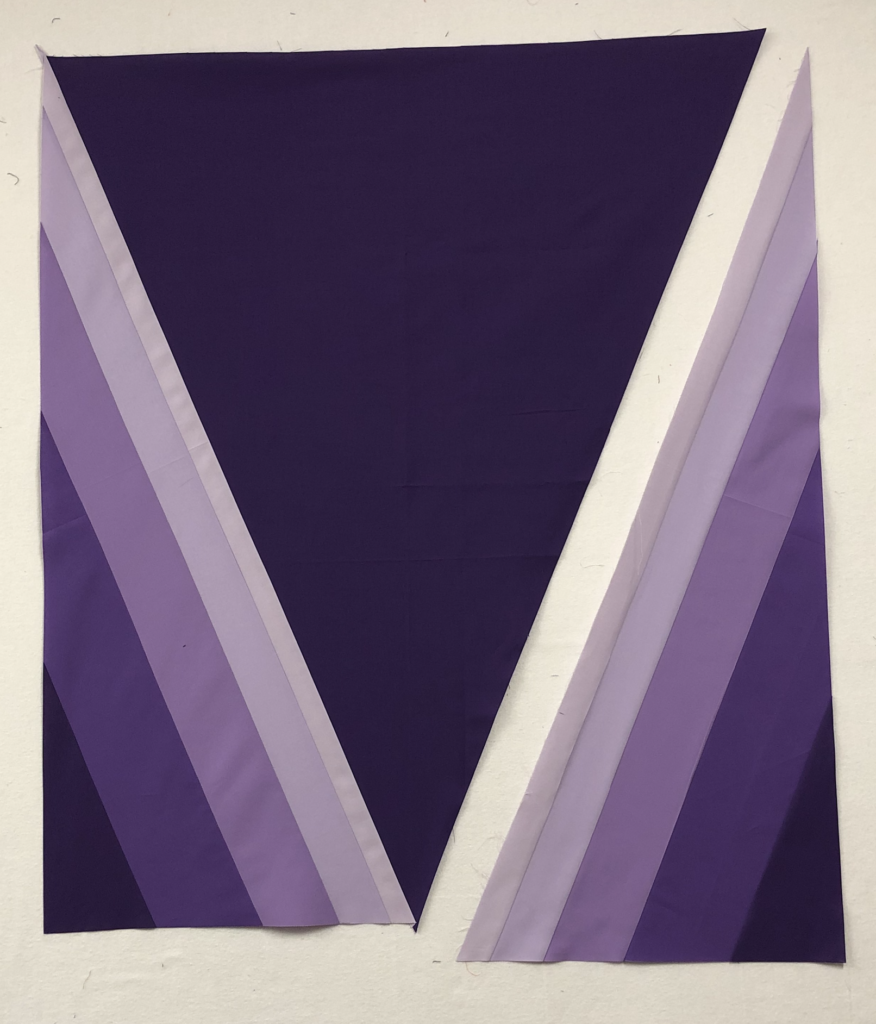
This is what you should have before we do the cuts to the side sections:
Now is a good time to stiffen these side sections with some spray starch or sizing like Best Press, if you have some.
Clean up the end of the strip set by taking off the selvedges, if you haven’t already done so. Don’t be too generous with that cut though, as you need 40 1/2” left on your V2 strip once the selvedge is removed.
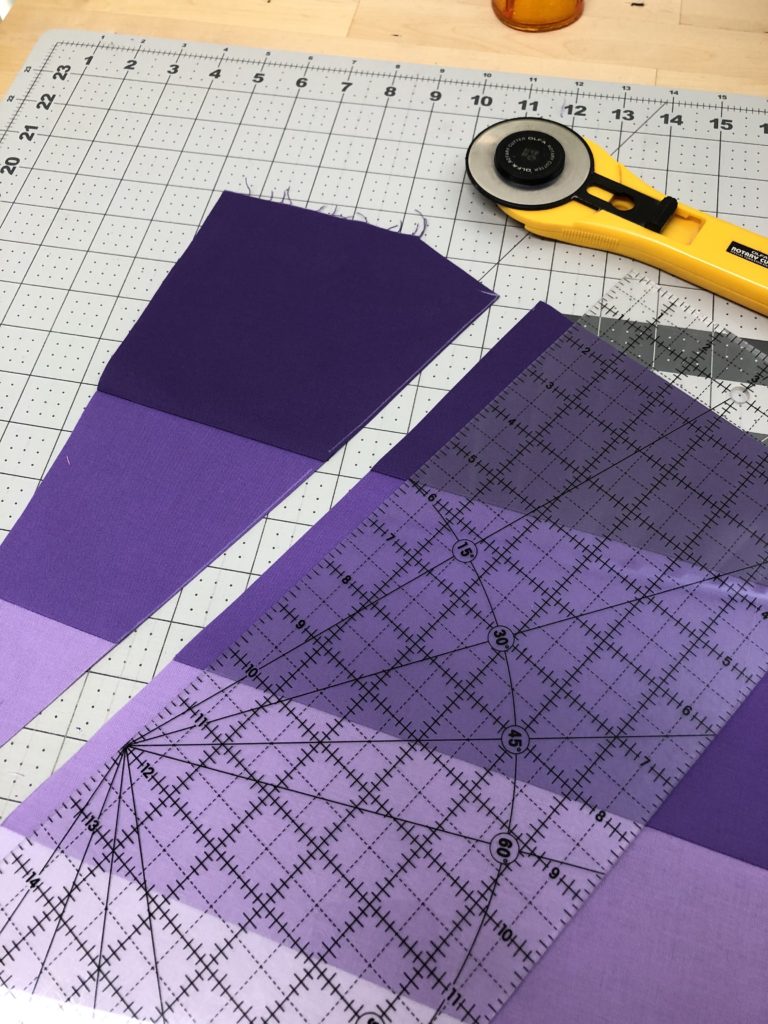
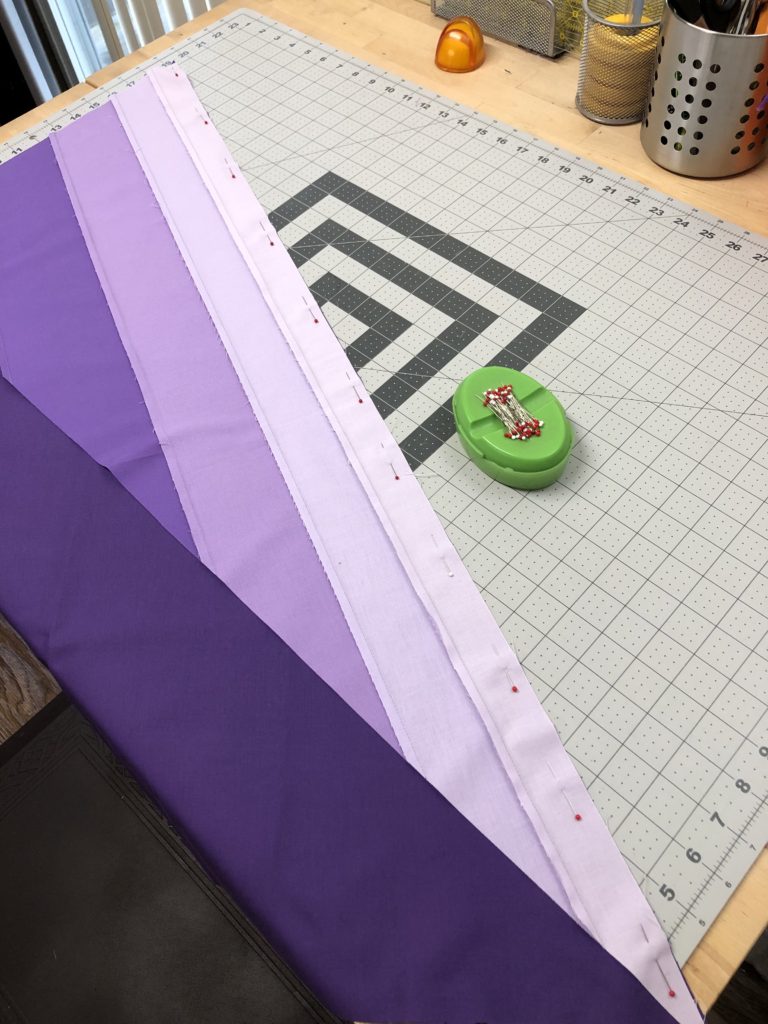
Stacking up rulers as needed, make the markings noted in the drawings at the bottom of page 5. This is the mark for the point that will become the lower corner of the V block:
If you don’t have enough rulers to stack, use any other decent tape measure:

Mark the cut lines:
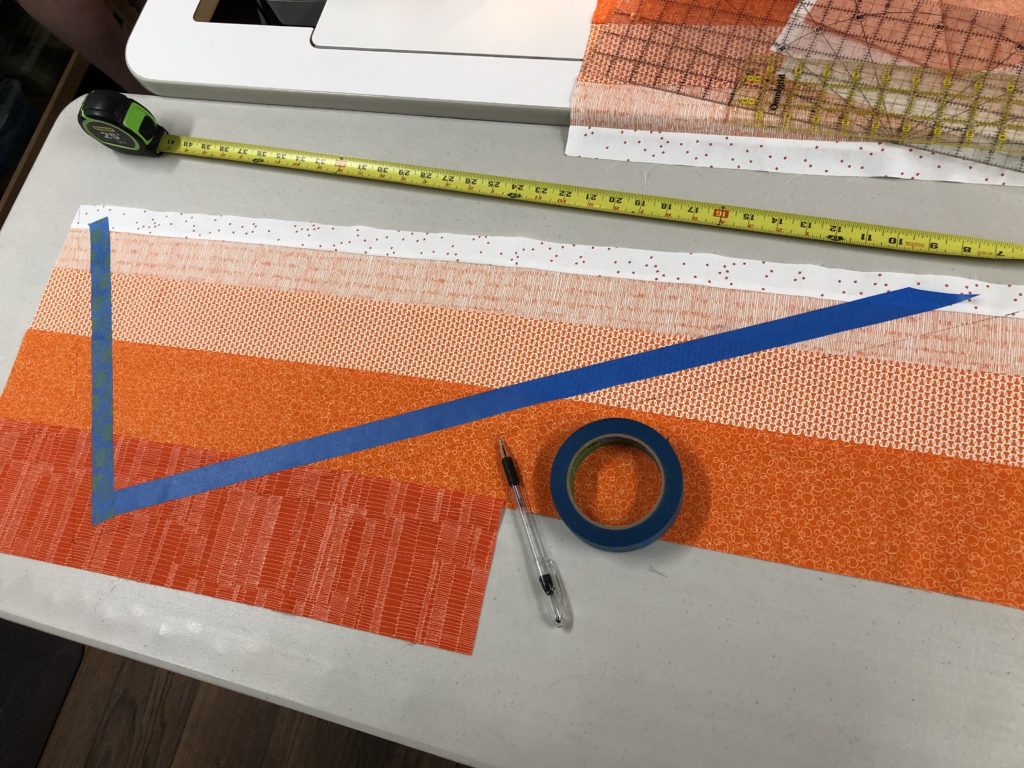
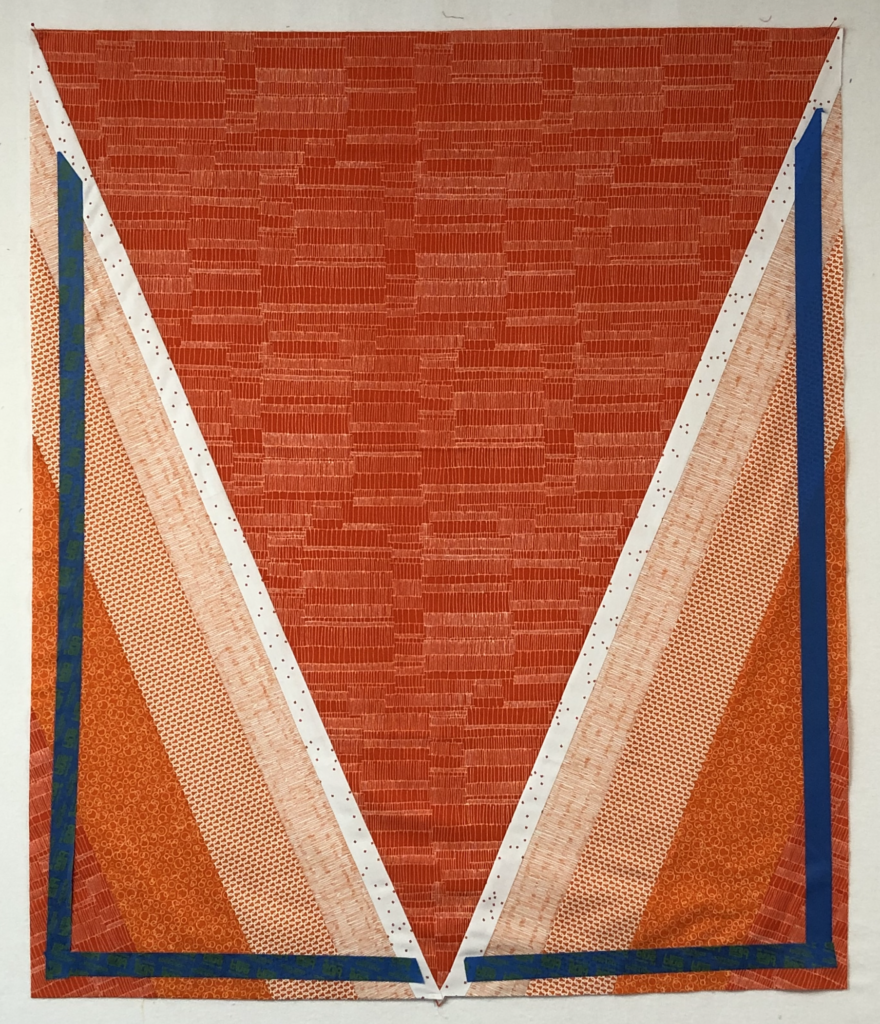
NOTE: The next photos are of a different quilt! A couple of people experienced some bigger stretching issues with the V block and asked me how to solve that after I had finished the purple quilt. Thus, the next few pictures are of an orange quilt, so bear with me!
At this point, and especially if you have not added any starch or sizing to this section, we’ll add some temporary “stay stitching” to these side sections. For our newbie quilters, stay stitching is used in garments to hold an edge together that might have some bias, and to keep it from stretching. I tested actually stitching this line, and it introduced a bit of stretch that made me grumpy, so I don’t recommend stitching. BUT… I found out you can run some tape inside the stitching line and it holds the edges from stretching well enough to piece the block into the quilt. In a pinch, you could also iron freezer paper to the section to hold it steady.
Thus, run a line of removable tape (painters tape, washi tape) about a 1/2” inside the cut line (not too close because you don’t want to sew on the tape):

Keep the tape on until you sew the V block into the quilt top!
OK… back to the purple quilt pix… just pretend they all have tape on them!
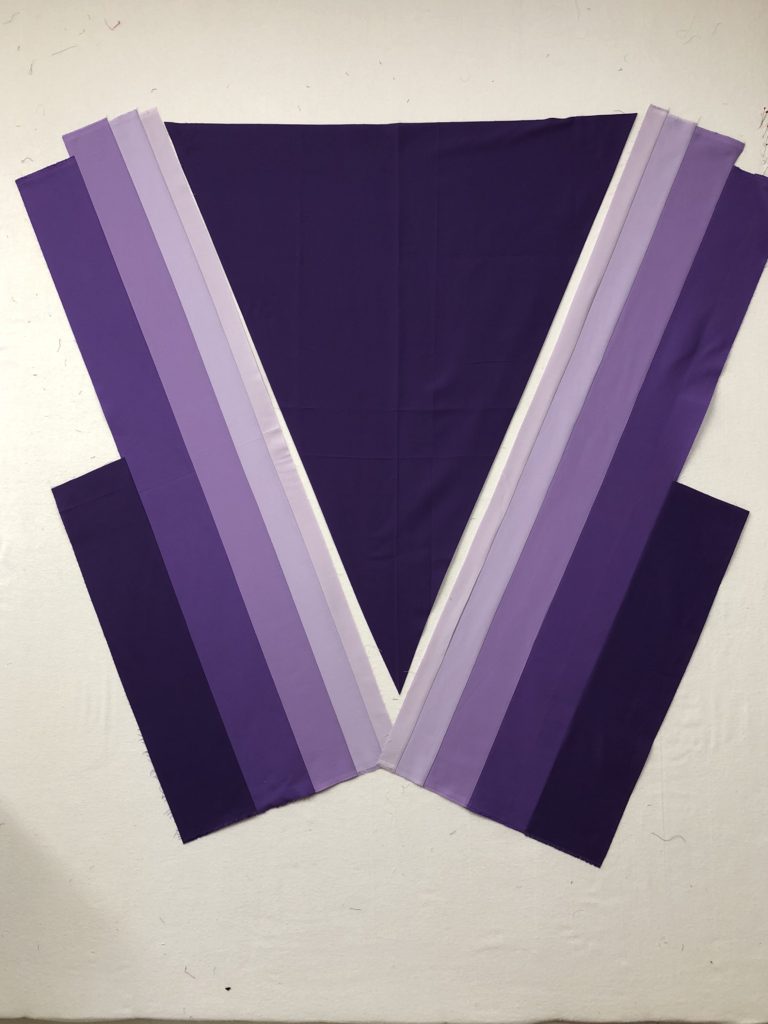
Cut out the side sections, along the marked line:
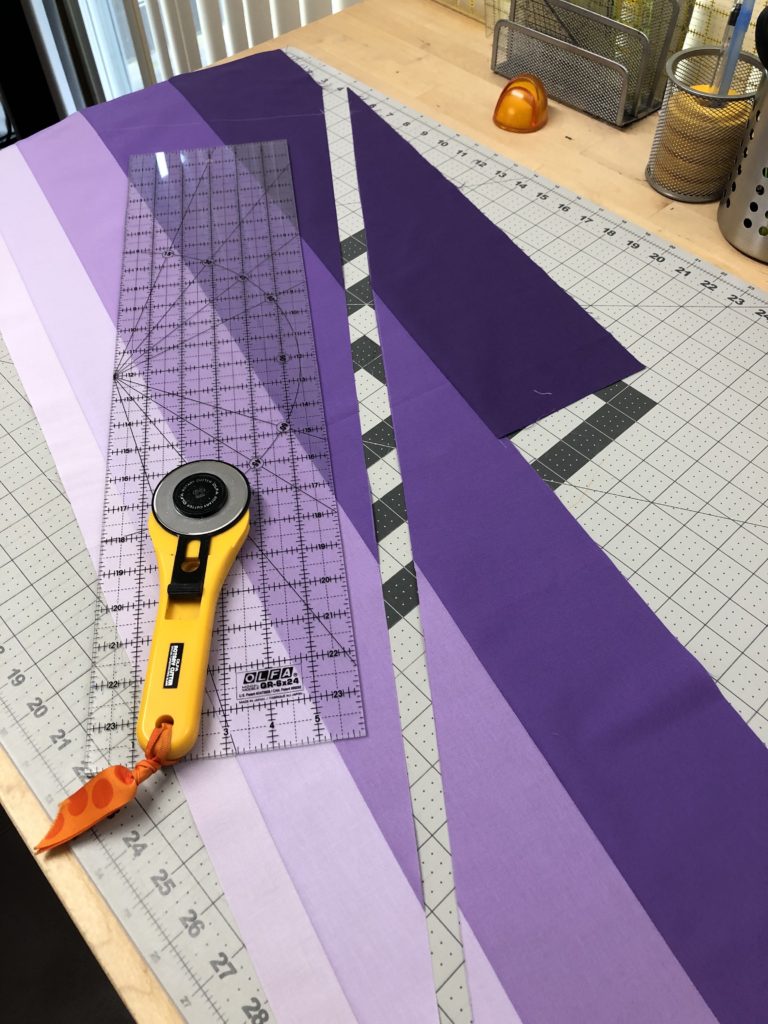
Repeat the lines, tape and cuts for the other side, remembering that it’s a MIRROR IMAGE:
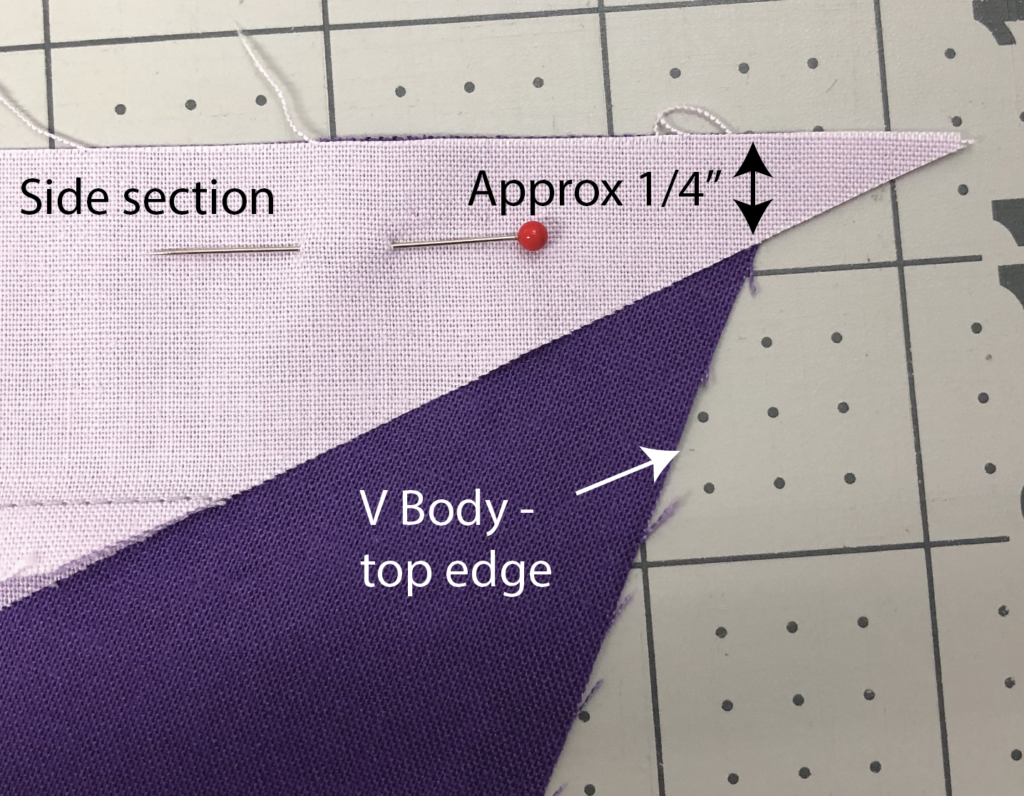
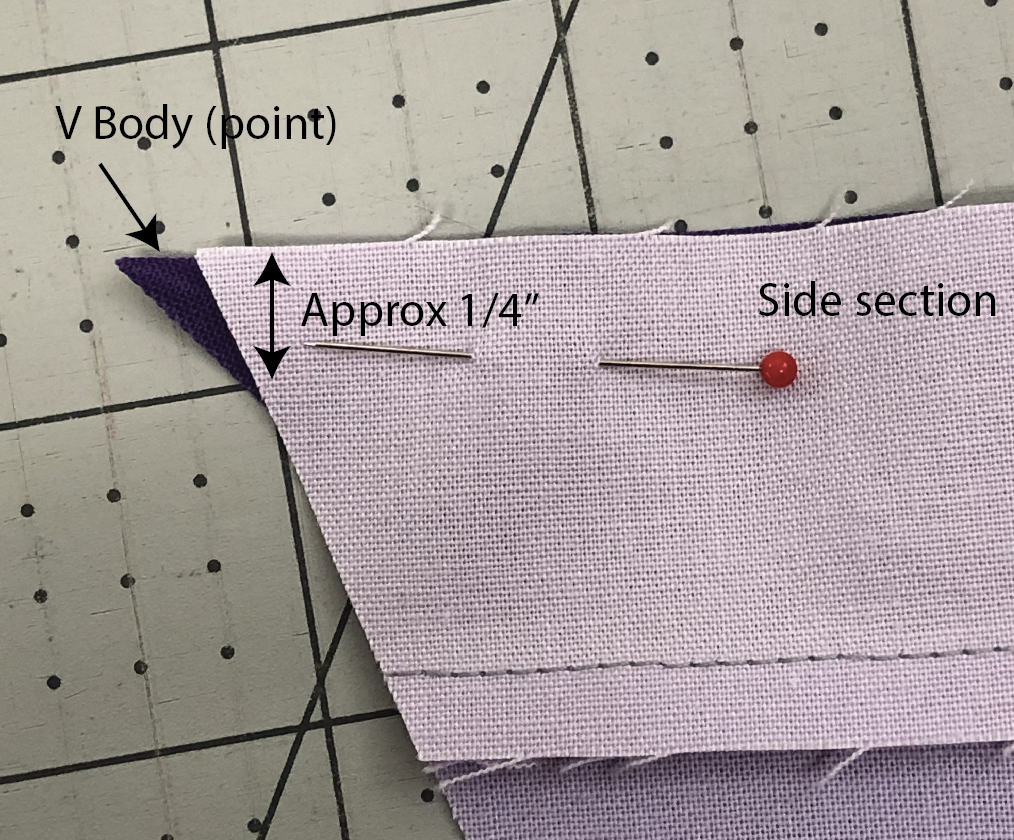
Now to sew the sides to the body of the V. Begin by pinning the ends together, letting the points of the side section intersect the V body by about a 1/4”:
Pin GENEROUSLY, easing these two seams until they fit together. Yes, it’s OK to stretch them a TINY bit, but don’t pull them any more than needed to make them fit. And it’s OK to lift up the tape if it’s stopping you from easing. What does GENEROUS pinning look like? It looks like one pin for every width of your hand at a minimum. And use pins, not clips, because fabric can’t slide under a pin the way you can make it slide under a clip. Why do this? Because more pinning means less ripping. And you DON’T want to rip these seams if you don’t have to, as they’ll stretch even more!
Sew the seam, being careful not to stretch it as you go. Give it good press, but try not to press the tape in case in makes a sticky mess:
Sew the second side to finish the V, repeating the steps above:
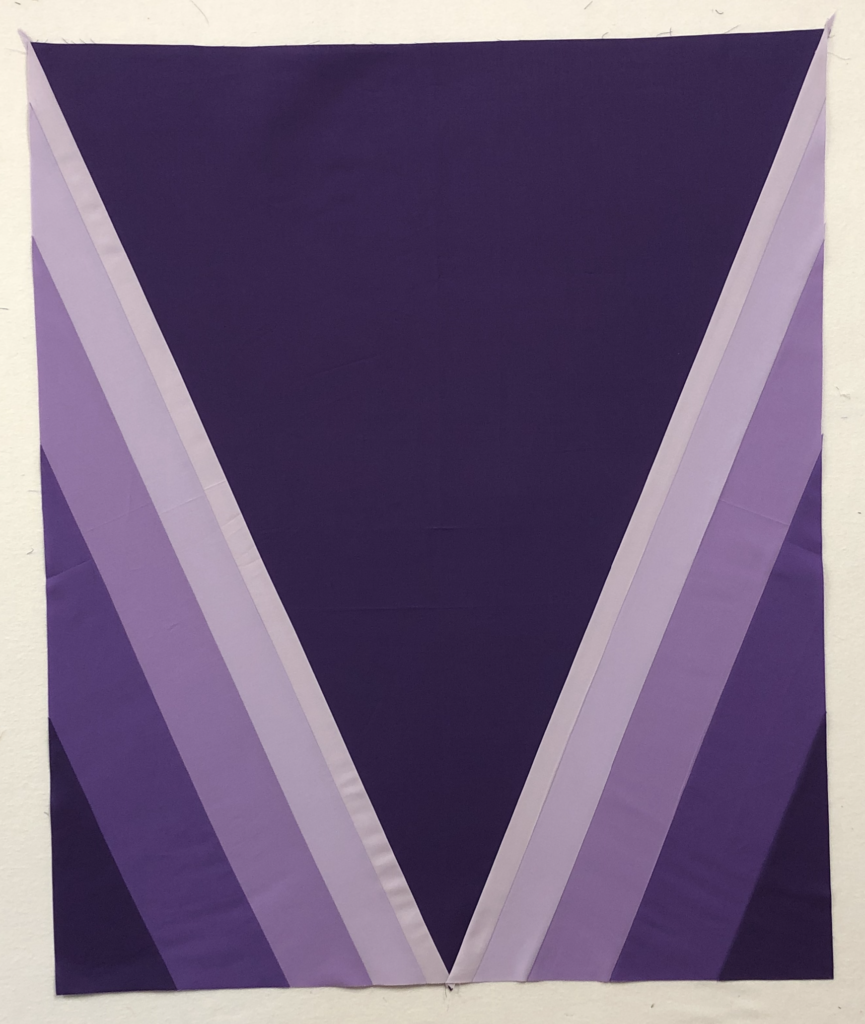
And if you still have the tape on yours, it should look like this:
Now the V is ready to be set into your quilt top!
Don’t forget to post your work on Instagram! For Colorblock LOVE use #colorblocklovequilt , #colorblockloveqal (or #colourblocklove if you speak the Queen’s English!) and if you’re making the Kinship + LOVE version, add #kinshiplovequilt .
Great suggestions for the V!! This letter gave me the most pause in my sewing. I even ordered extra fabric for the V body because I figured that’s where the mistakes would occur. I did well though. My quilt is done already but I did use your multiple ruler trick without seeing your suggestion (makes me feel so smart :o) . . . .) I’ll keep in mind the tape trick because my daughters want one of these quilts some day. I have one curious question though. Is there a reason for pinning parallel to the edge of the fabric here, rather than perpendicular?
Its really just preference… I sew with a seam guide on my machine, so perpendicular pins run into it.