
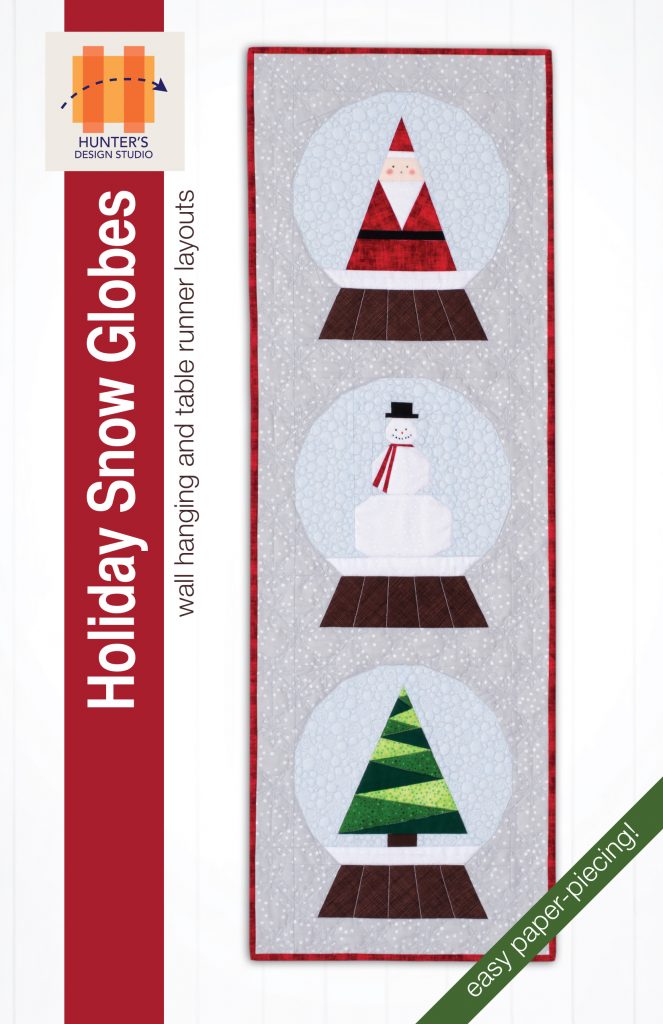
Today I’m sharing some construction tips for my new pattern, Holiday Snow Globes.
Holiday Snow Globes is a paper-pieced pattern, and you can construct it vertically for a wall hanging, or horizontally for a table runner. You can buy it here.
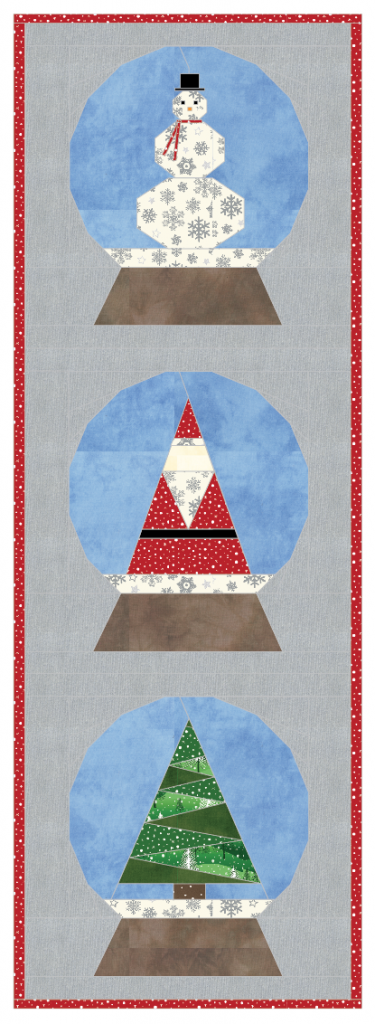
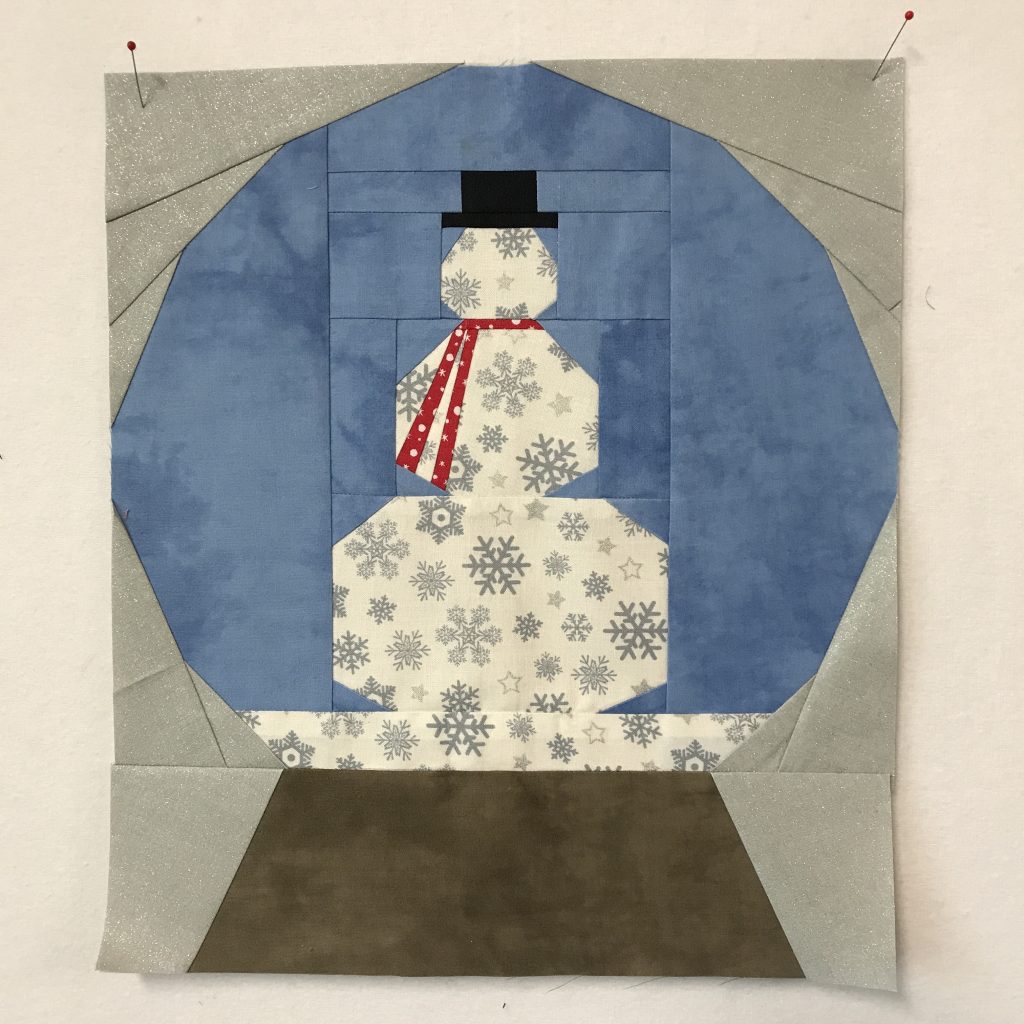
Below is a digital mockup using some Windham Fabrics… isn’t it sweet?! I love how the snowflake fabric works in the snowman! And the gray is actually beautiful and shimmery.
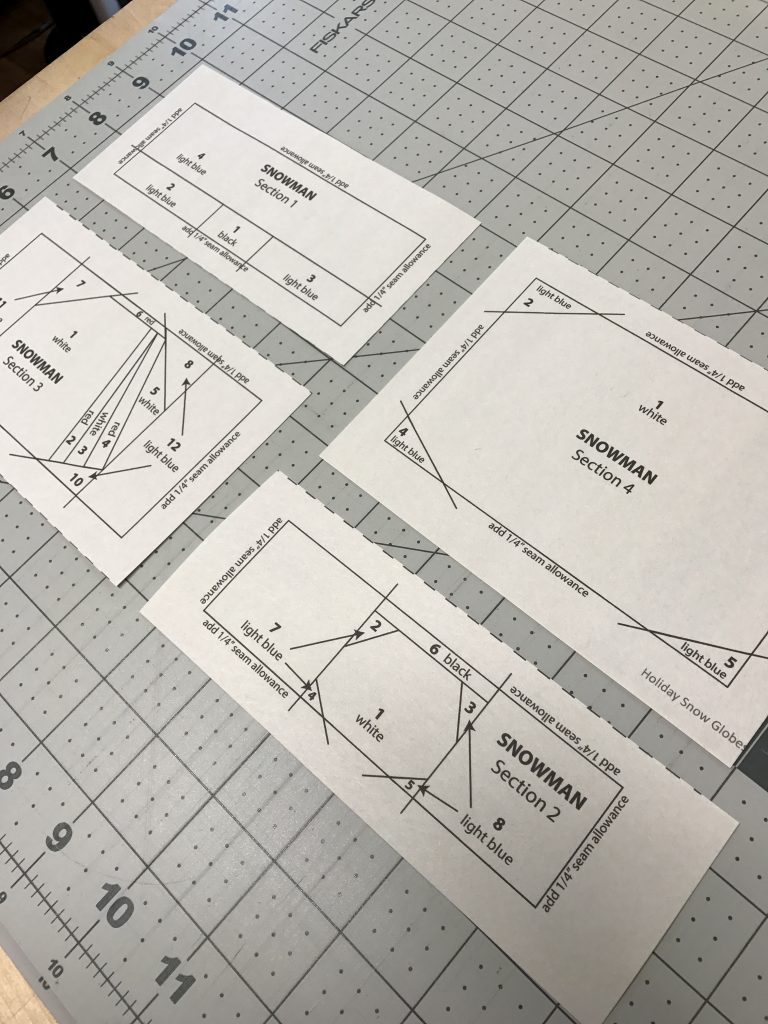
The Tree and Santa blocks are really easy – the entire globe section constructs in just one piece, and then the base of the snow globe is added as a second section. The Snowman is different: he has a few more pieces, but none of them are hard, so below is a quick tutorial on how he goes together.
First, print or copy all the paper-piecing patterns. I like to copy them onto newsprint as it’s lightweight and semi-transparent. It also tears off like a dream.
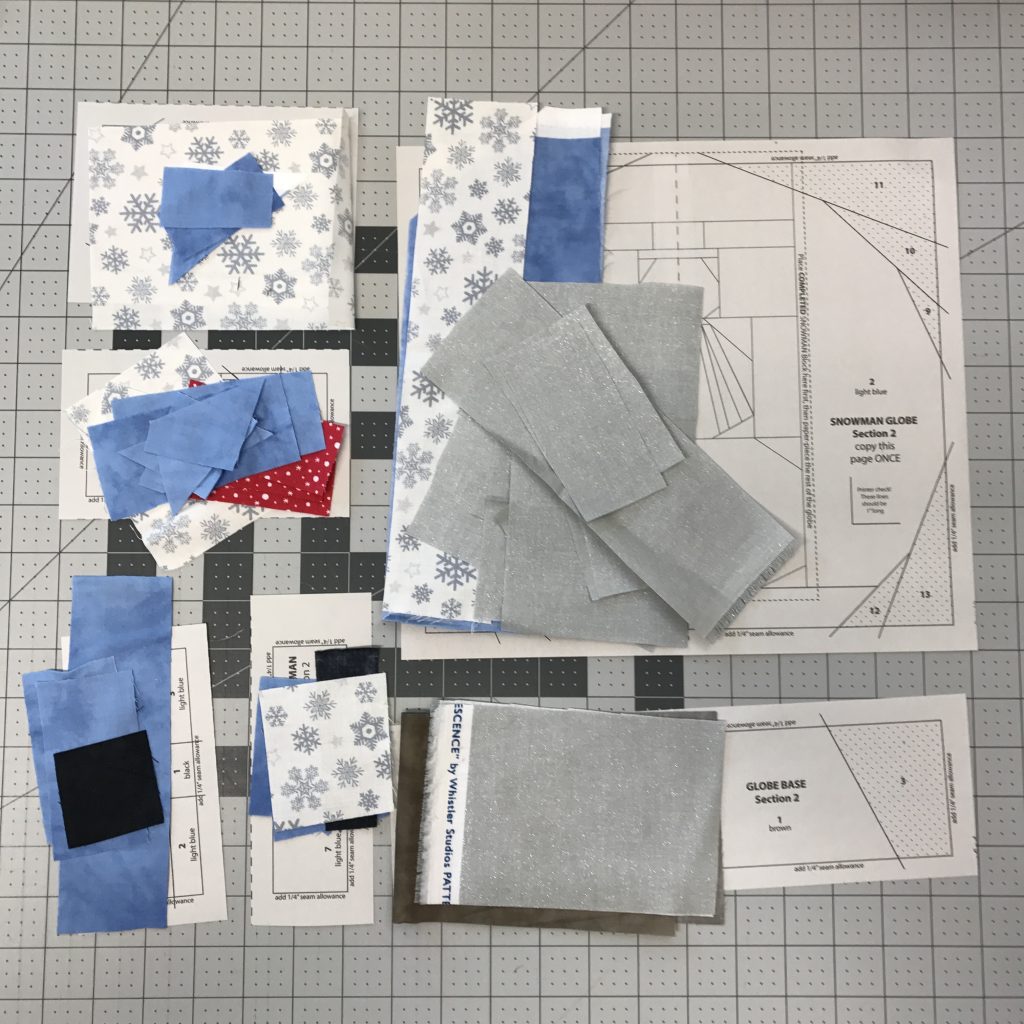
Separate the Snowman sections:
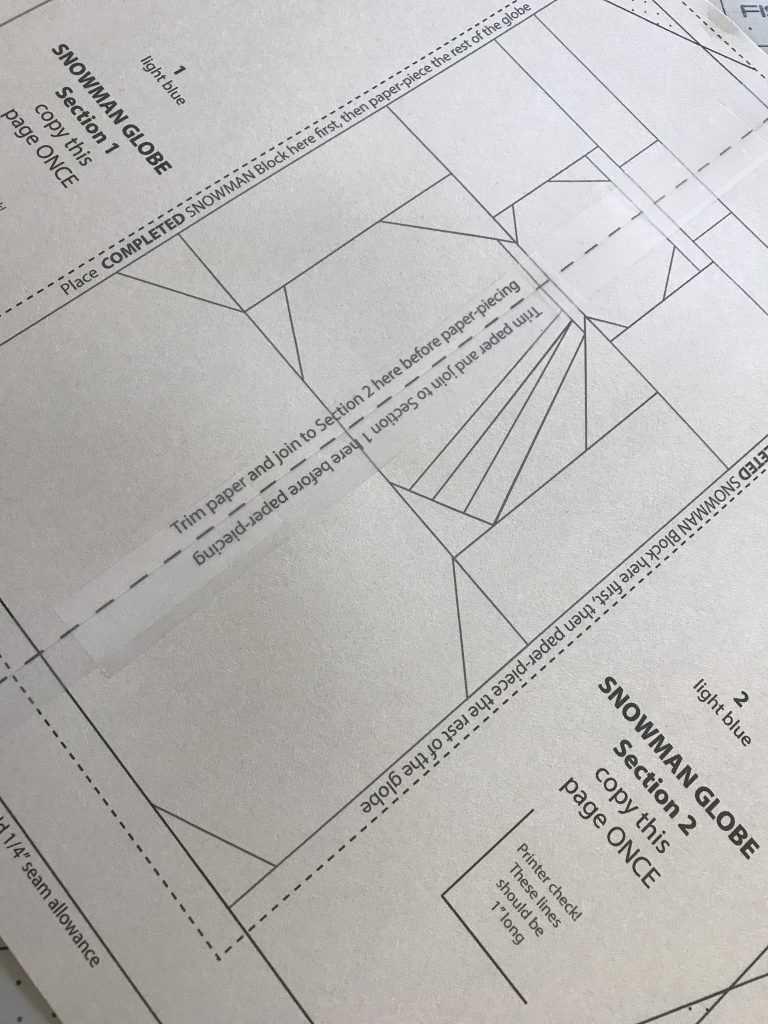
And tape the globes and bases together:
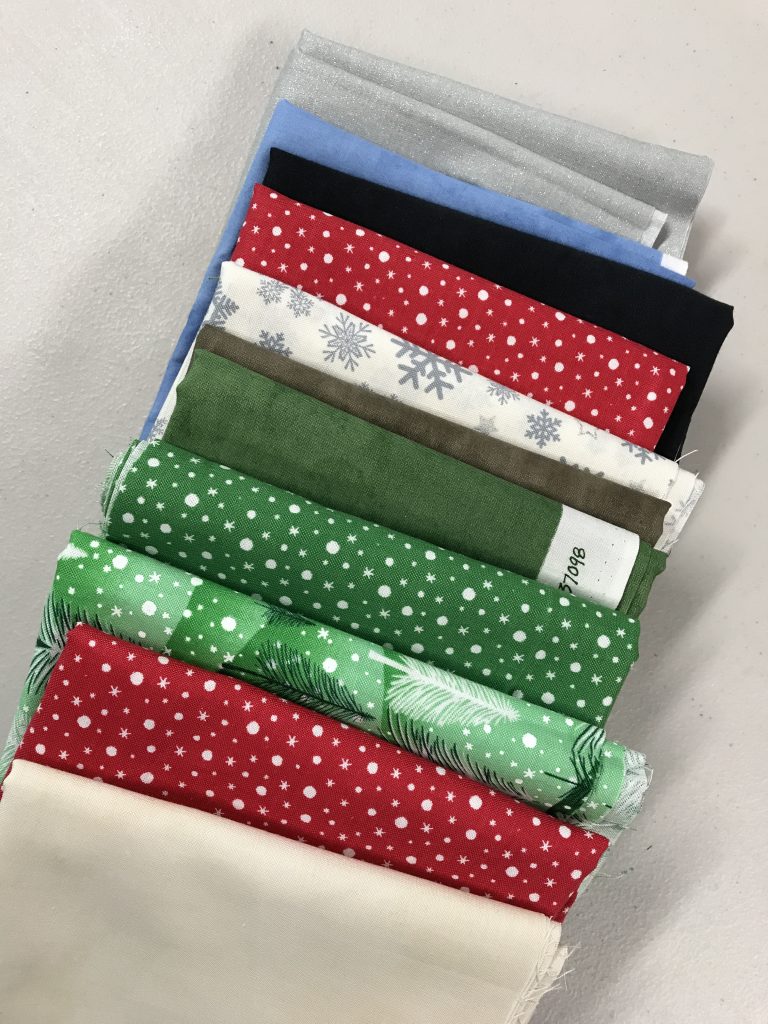
Here are the fabrics I’ll be using:
I like to precut my fabrics when I paper-piece. I cut them and stack them with each paper section, often in order. That way, when I take them to the machine I’m ready to sew.
Paper-piece the four sections of the Snowman (for paper-piecing tips, check YouTube or refer to the How to Paper Piece section in my book Quilt Talk):
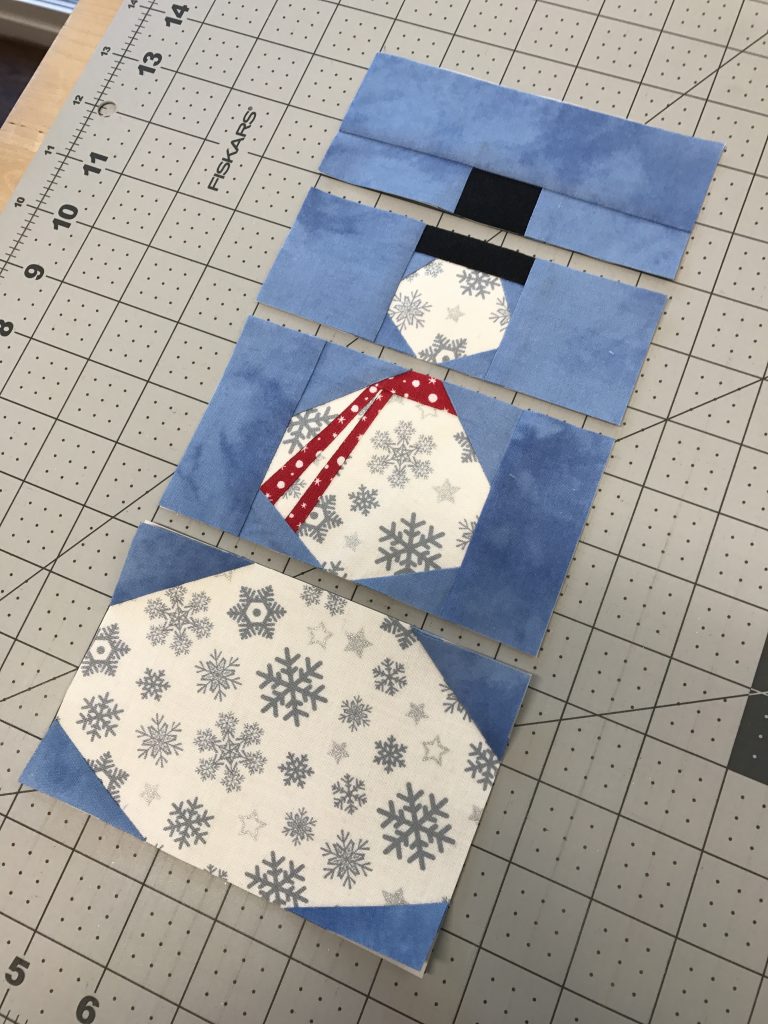
Sew the sections together, and then pin the entire snowman to the globe section – this becomes piece number 1 of the next block!
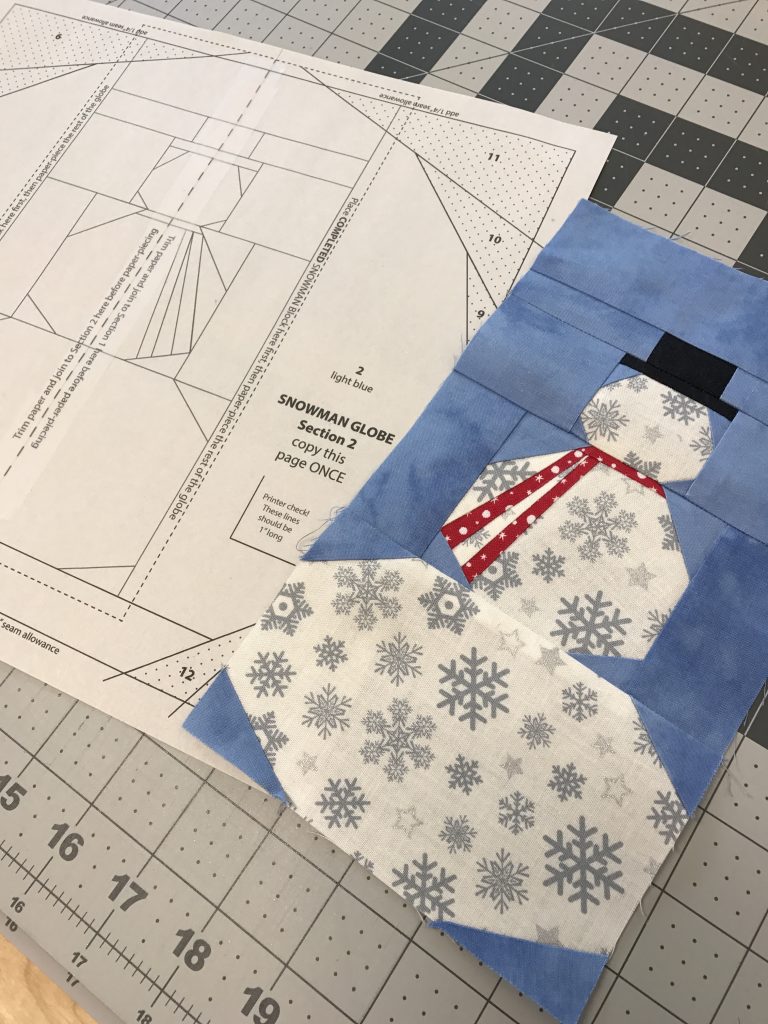

Continue paper-picing the rest of the globe around the snowman:
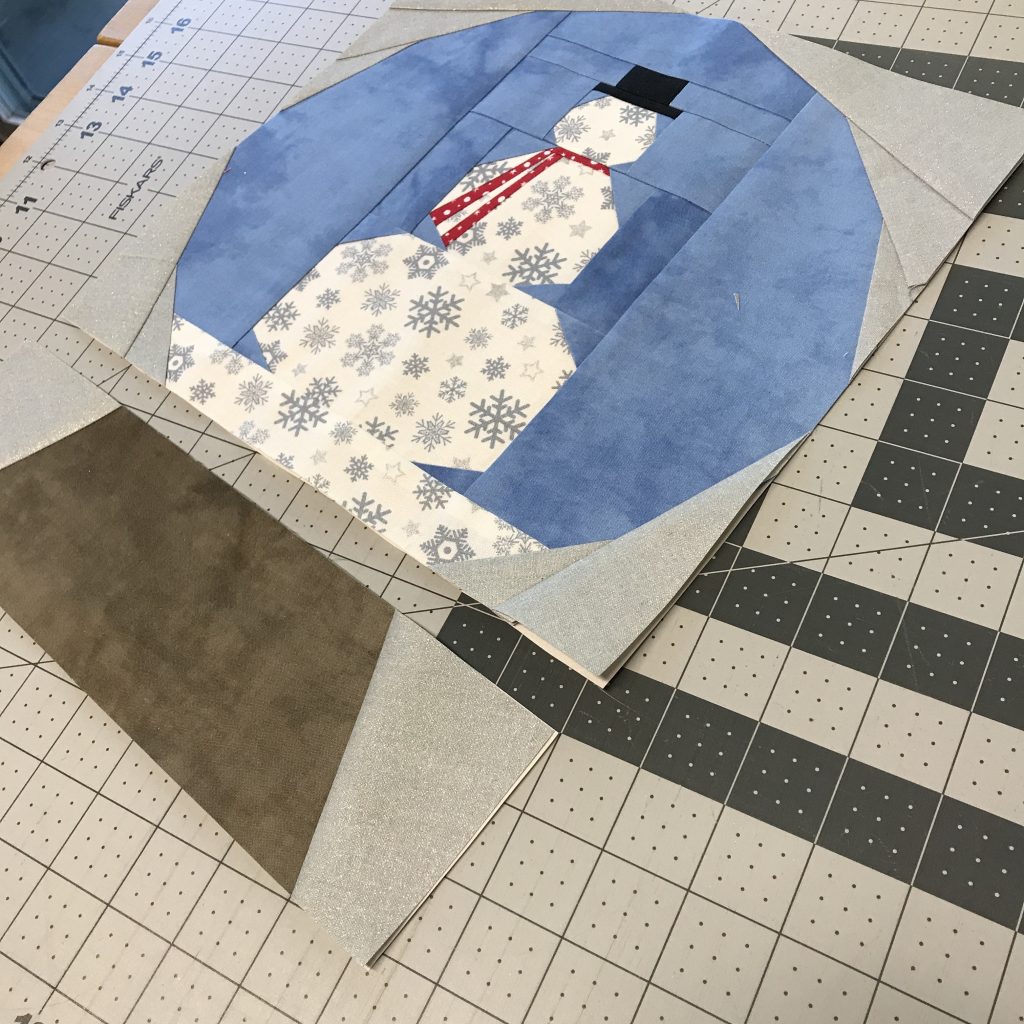
Attach the globe base to finish the block!
I love how unique this pattern is and modern. You are very talented
This is an adorable pattern!
Fabulously clever pattern for the snow globes.
Your paper piecing is amazing. I had to look a few times because the circles are spot on. Thank you for the tutorial and sharing the snowman block.
Cute holiday pattern and I love paper piecing. I getting inspired to start some Christmas projects. Thsnks
Cute pattern and I love Christmas fabric!!
Wow! Love this pattern set! Will have fingers crossed for the drawing but the plan is to purchase. Thank you for the chance though!
Adorable pattern. Go Oregon !!!!!
Although I don’t like paper piecing, your pattern is very cute. I love the snow globes and I really love those fabrics. Thanks for the chance.
Paper piecing scares me. ???? This is adorable.
I have only done paper piecing a few times…but with such a cute snowman how can I resist! Thank you for the giveaway!
I LOVE this pattern! It is so cute. I like to paper piece too.
i love these snow globes, such a clever idea.
I LOVE the green tree fabric in this line! Also the red and green dot fabrics! I love dots!
I love Christmas making – this is adorable!
These are sooo cute. Who doesn’t love snowglobes?
Oh Samster! You know my heart so well!!!
‘Tis the season to be thinking ahead.
I have not paper pieced is years (YEARS) but I definitely want to do this one!!!!
Thank you speaking to my holiday heart!
The pattern is very modern looking. I have become a fan of paper piecing.
Your snow globes are adorable!
I’m loving the fabrics and the pattern! Jadahlgr at Yahoo dot Com
Super cute Sam!!
Such a cute design. Thanks for sharing.
I’ve never done paper piecing, but with patterns like yours I’d love to give it a try!
This is adorable! Thanks for sharing!
This is a great Christmas pattern!
Very Cute! Thanks for including the instructions.
So, so cute! Yes the snowflake fabric is a great complement to the snowman, and I like how it suggests the loose snow in the bottom of the globes.
Love the snow globe. I made the single Santa snow globe for my brother and his wife for Christmas. It came out real nice.
The snowglobe quilt is so cute! I just love paper piecing.
I have a niece who collects snow globes. This would be a perfect project for her!
Love this!! Super cute!
Loooove the snowman snow globe. Thanks!
Very cute pattern, you have a lot of talent. The fabrics for each paper piece are just perfect and go so well together. Having a great time with this blog hop. Can’t wait for tomorrow. Thanks.
Pretty collection.
Love Snow globes…. such a cute pattern
Now follow you on IG. I’m just a beginner and it’s fun.
Those snow globes are darling. Thanks for the idea of pre cutting pieces for paper piecing (now if I could only figure out what size I needed!) Practice makes progress on that front.
This fabric looks great used in your snow globes
I love these snowglobes. Such talent!
Love snowglobes. I can see the snow swirling around the snowman already!
Thank you for this great tutorial! I want to make this for a gift this year.
I follow on Instagram.
Love love love the snow globe pattern!!
These snow globes are adorable! Great ideas on this blog hop – thank you so much!
How cute! I used to collect snowglobes , before I started collecting children. I love your patterns!
I love paper piecing. Your pattern is so cute and those fabrics are perfect.
I love your snow globe pattern, they’re the unbreakable kind! (I have bad luck with the real ones, my Mickey and Minnie Wedding snow globe sprung a leak in my luggage on the way back to Wisconsin after the honeymoon ????).
What a clever idea for a pattern! I’ve not tried paper piecing yet, but maybe I should!
These are so darn cute!
Great pattern and I love your fabric choices.
Very cool idea tyty for ideas…. love the fabric tooo…. happyness04431@yahoo.com
I love the pattern and fabric. I also love snowmen ⛄️. Would love to with this.
These are so cute and the fabric is perfect.
love the snow globe patterns.
I would love to win this so I can try paper piecing! It is sooo cute.
I love to win the fabric.
I have not done paper piecing. This snowman is so cute. I need to learn how!
This is cool!! Who doesn’t love snowglobes??!!
I love snow globes. As Kathy notes (just above me), who doesn’t? Thanks for showing two different versions, both charming.
This is a great idea. I have to set my mind in a “paper piecing” mode and then I’m good to go. This would be fun.
Thank you for the giveaway! I love blog tours!
Very cute!
Love the pattern and the fabrics.
You have inspired me to try paper piecing again. Love your designs!
Great pattern and lovely fabrics. Thanks for the opportunity to win!
I love paper piecing! Your design is so cute…puts you right in the Christmas spirit!
Thanks for sharing your wonderful project.
So cute! I’ve never done paper piecing before, but I’m tempted to try . . . 🙂
This is such a cute pattern. Fabrics are perfect for this!
Love your snow globe pattern
I really like the snow globes, especially the snowman one.
A great trio of snow globes.
What a bright beautiful Block! Thanks #WindhamFabrics for sharing a great giveaway!
I love snow globes and the idea of making a quilted wall hanging with them is awesome! Thanks!
I love the snow globes! Lovely Christmassy idea ????????????
Snow globes are something I’ve always loved. I used to have a large collection of them. These Christmas ones you’ve made are delightful. Thank you for the paper-piecing tips – I need lots of help with that. =) Thanks also for you and Windham giving away this lovely fabric.
What a fabulous block!
So cute! I love snow globes.
I love paper piecing and snow globes! Put them together and my gosh! Love it!! ❤❤
Adorable prints. Adorable snow globe pattern. Thanks!
I love the snow globe pattern! 🙂 Looks so cute in this fabric
This is great! I love snow globes and enjoy small paper piecing projects. Thanks!
This is a great snow globe pattern!
Love the fabric! Thanks for the interesting tutorial!
This is a fun Christmas idea, I like the tree block best. x
LOVE this modern pattern! I adore paper piecing and this is so cute, yet modern. How do I get the pattern, Sam?
Oh that is just too cute. Thanks for sharing your sweet quilt!
This is so lovely
Love as a wall hanging
Snowglobes! What a great idea!
This is adorable! I want to try my hand at something like this!
Super cute pattern!! I love it❤️
Really nice design – very creative. Thanks for the chance!
I would love this for a wall hanging!!!
This is a great pattern. You could make just one of the individual designs and use it as the front of a pillow or a smaller wall hanging. And, I love paper piecing!
I used to have quite a collection of snow globes! One of my favorite winter decorations.
This is a very sweet snowman pattern. I am not that good of a sewer yet, but I hope to get there.
Like the Snowglobe idea for a pattern!
barbkaup(at)(yahoo)(dot)(com)